Integrate Stereolabs ZED Cameras with Foxglove
With Foxglove, you can stream data from any of the Stereolabs ZED cameras:
- ZED Mini
- ZED 2
- ZED 2i
- ZED X series
The ZED Foxglove Integration utilizes Stereolabs' ZED SDK and Foxglove SDK to stream real-time image and point cloud data from ZED cameras to Foxglove. Both Python and C++ implementations are available.
Installation
If you are using ROS, launch ZED ROS 2 wrapper, and run Foxglove Bridge, as described in ROS 2 Documentation.
ZED SDK Installation
- Ubuntu
- NVIDIA Jetson
- Windows
- Download the ZED SDK for Ubuntu
- Install zstd:
sudo apt install zstd - Run the installer:
chmod +x ZED_SDK_UbuntuXX_cudaYY.Y_vZ.Z.Z.zstd.run
./ZED_SDK_UbuntuXX_cudaYY.Y_vZ.Z.Z.zstd.run
- Download the ZED SDK for NVIDIA Jetson
- Run the installer:
chmod +x ZED_SDK_Tegra_L4TXX.X_vY.Y.Y.zstd.run
./ZED_SDK_Tegra_L4TXX.X_vY.Y.Y.zstd.run
- Download the ZED SDK for Windows
- Run the installer and follow the prompts
- Set up CUDA as described in the ZED SDK documentation
- Restart your computer to update the environment variables
For up-to-date instructions on ZED SDK and CUDA installation, refer to the Stereolabs documentation.
ZED Foxglove Integration Setup
- Python
- C++
Python Installation
-
Clone the repository:
git clone https://github.com/stereolabs/zed-foxglove.git
cd zed-foxglove -
Navigate to the Python directory:
cd python/ -
Install Python dependencies using uv (recommended):
uv syncOr using pip:
pip install foxglove-sdk>=0.4.0 numpy>=2.0 opencv-python>=4.10 requests>=2.31 -
Install ZED Python API: The project includes the ZED Python wheel. Install it with:
pip install pyzed-5.0-cp310-cp310-linux_x86_64.whl
C++ Installation
-
Clone the repository:
git clone https://github.com/stereolabs/zed-foxglove.git
cd zed-foxglove -
Navigate to the C++ directory:
cd cpp/ -
Build the project:
mkdir build && cd build
cmake ..
make -j$(nproc)
Usage
- Python
- C++
Running the Python Application
cd python/

# Stream to Foxglove via WebSocket
uv run python main.py --ws

# Record to MCAP file
uv run python main.py --mcap output.mcap

# Both streaming and recording
uv run python main.py --ws --mcap output.mcap
Running the C++ Application
cd cpp/build/

# Stream to Foxglove via WebSocket
./zed_foxglove --ws

# Record to MCAP file
./zed_foxglove --mcap output.mcap

# Both streaming and recording
./zed_foxglove --ws --mcap output.mcap
Command Line Options
| Option | Description | Default |
|---|---|---|
--ws | Enable WebSocket server for live streaming | Disabled |
--mcap <file> | Output MCAP file name | output.mcap (C++), disabled (Python) |
--help, -h | Show help message | - |
Visualize Depth Camera Data in Foxglove
To visualize the ZED camera data in Foxglove, run the application with the --ws option, as described in the previous section, and follow these steps.
Make sure you are on the same network as your robot. In Foxglove, select Open connection from the dashboard or left-hand menu.
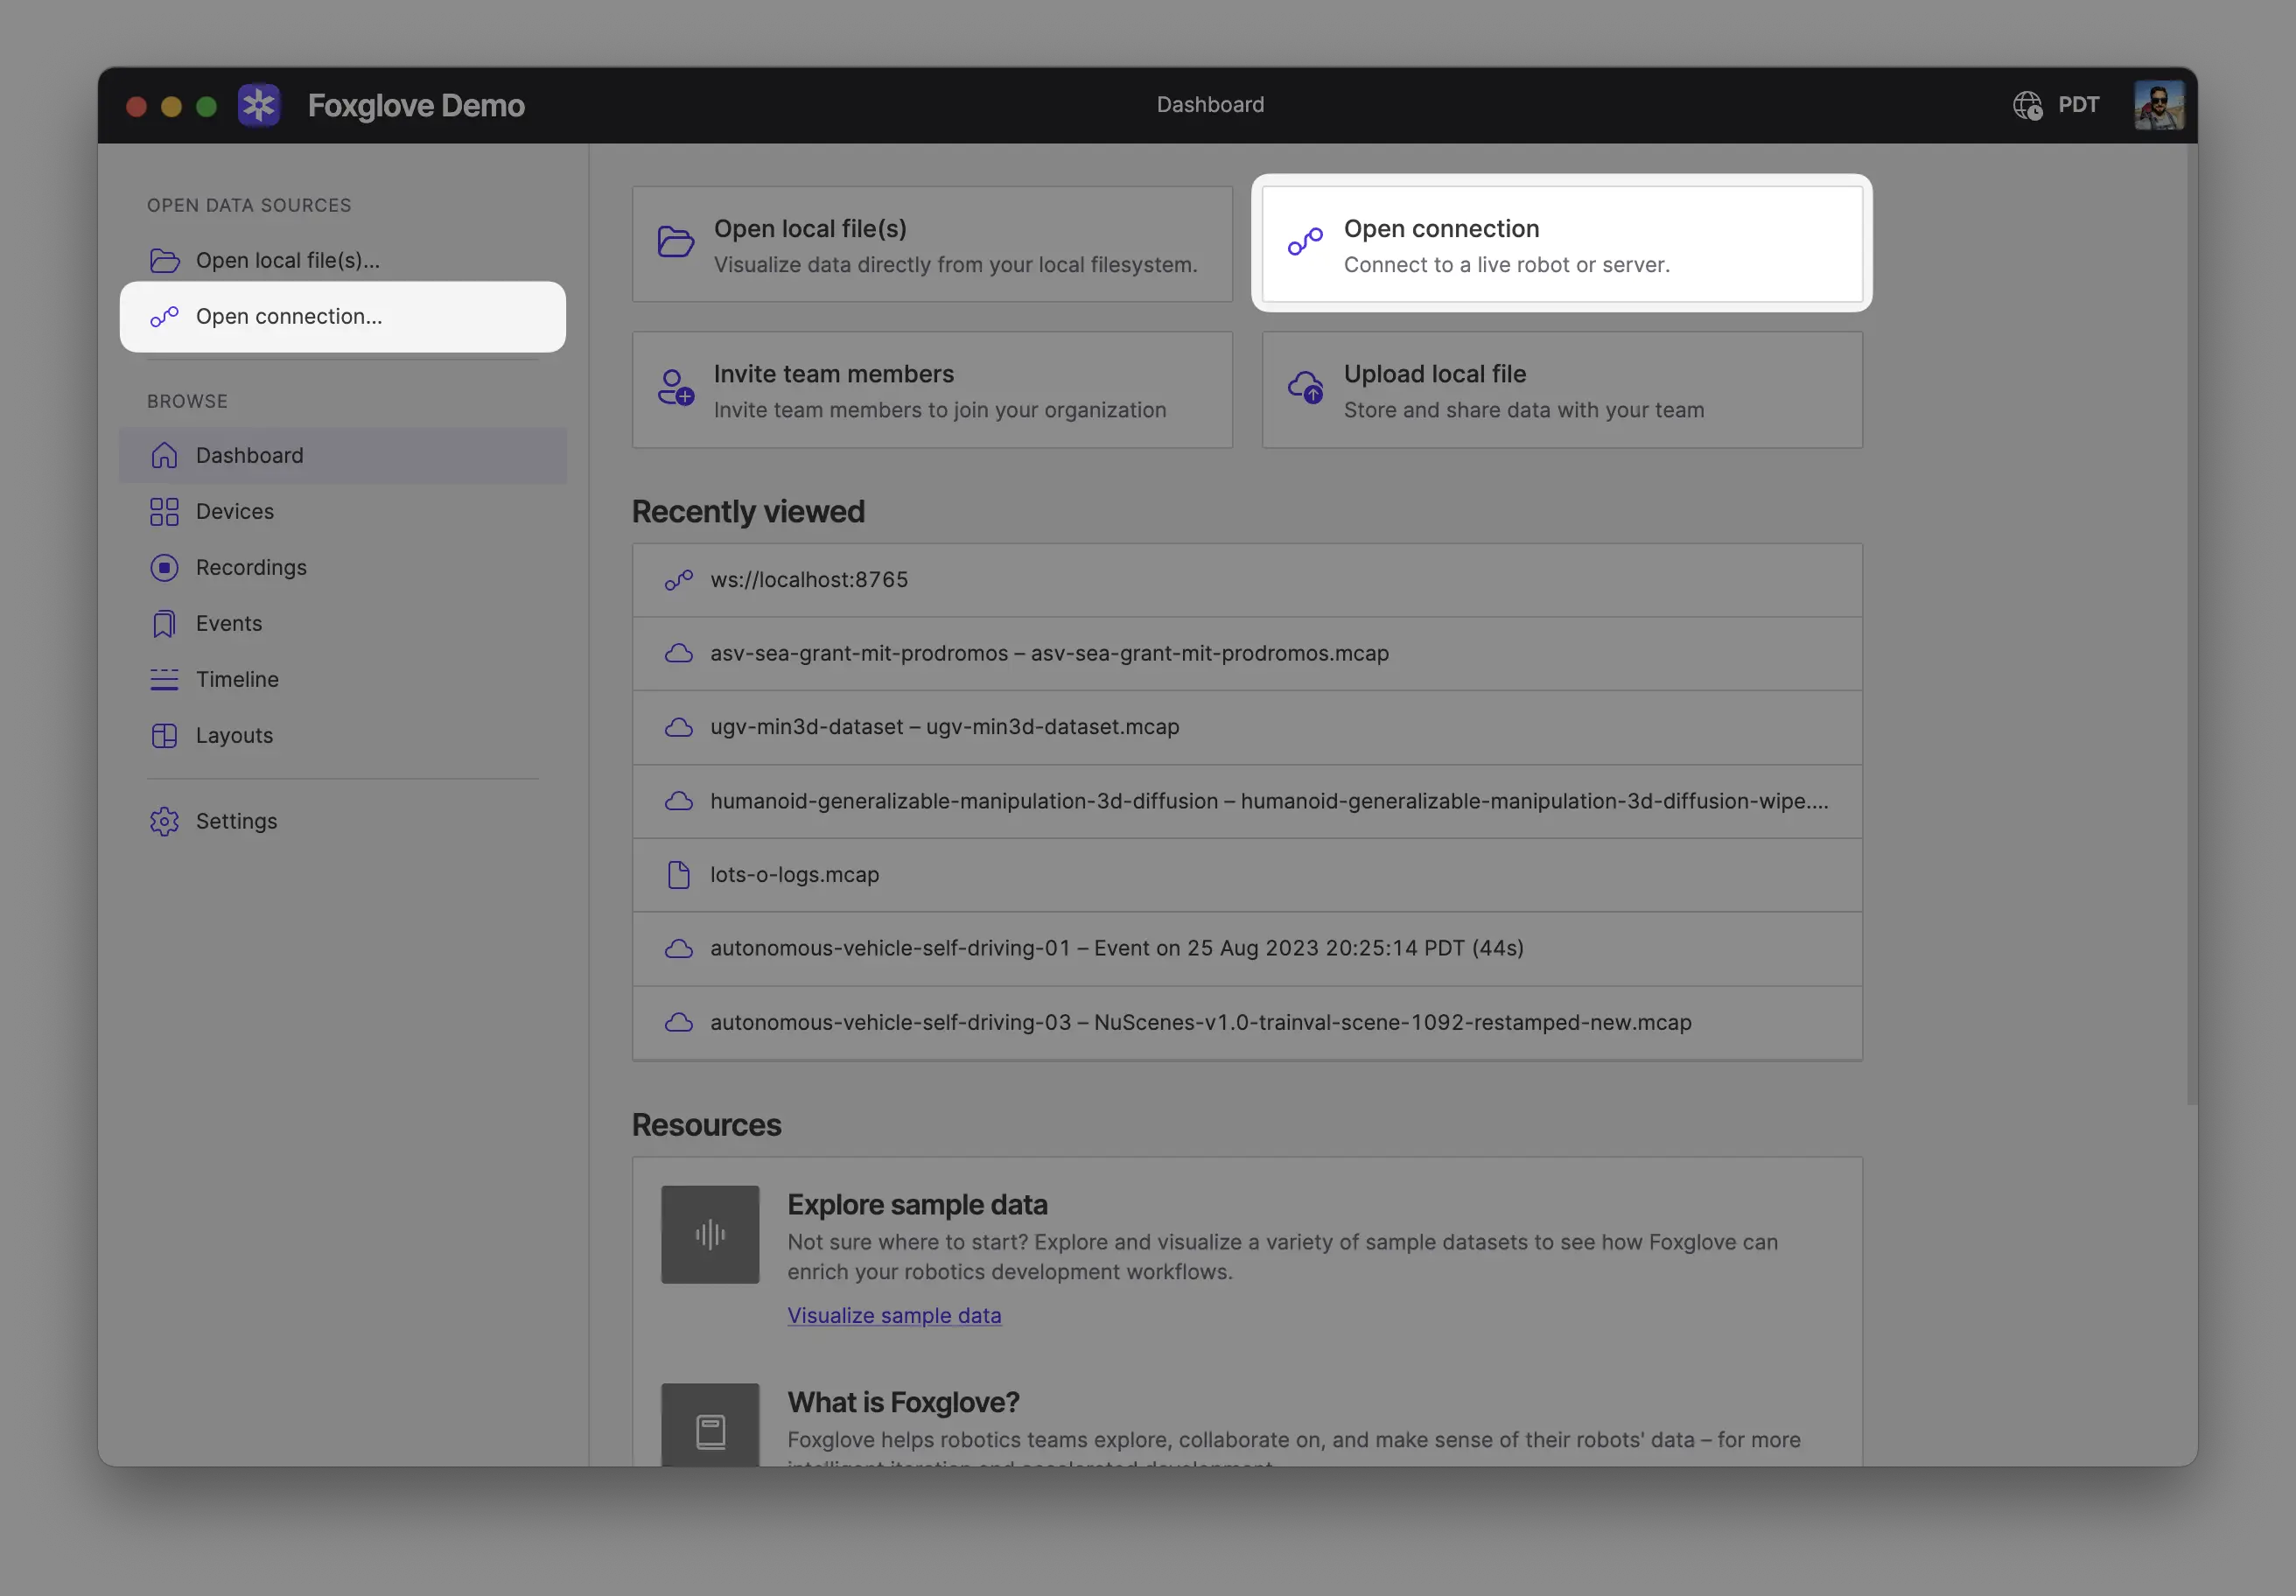
Select Foxglove WebSocket in the Open a new connection dialog, then enter the URL of the server:
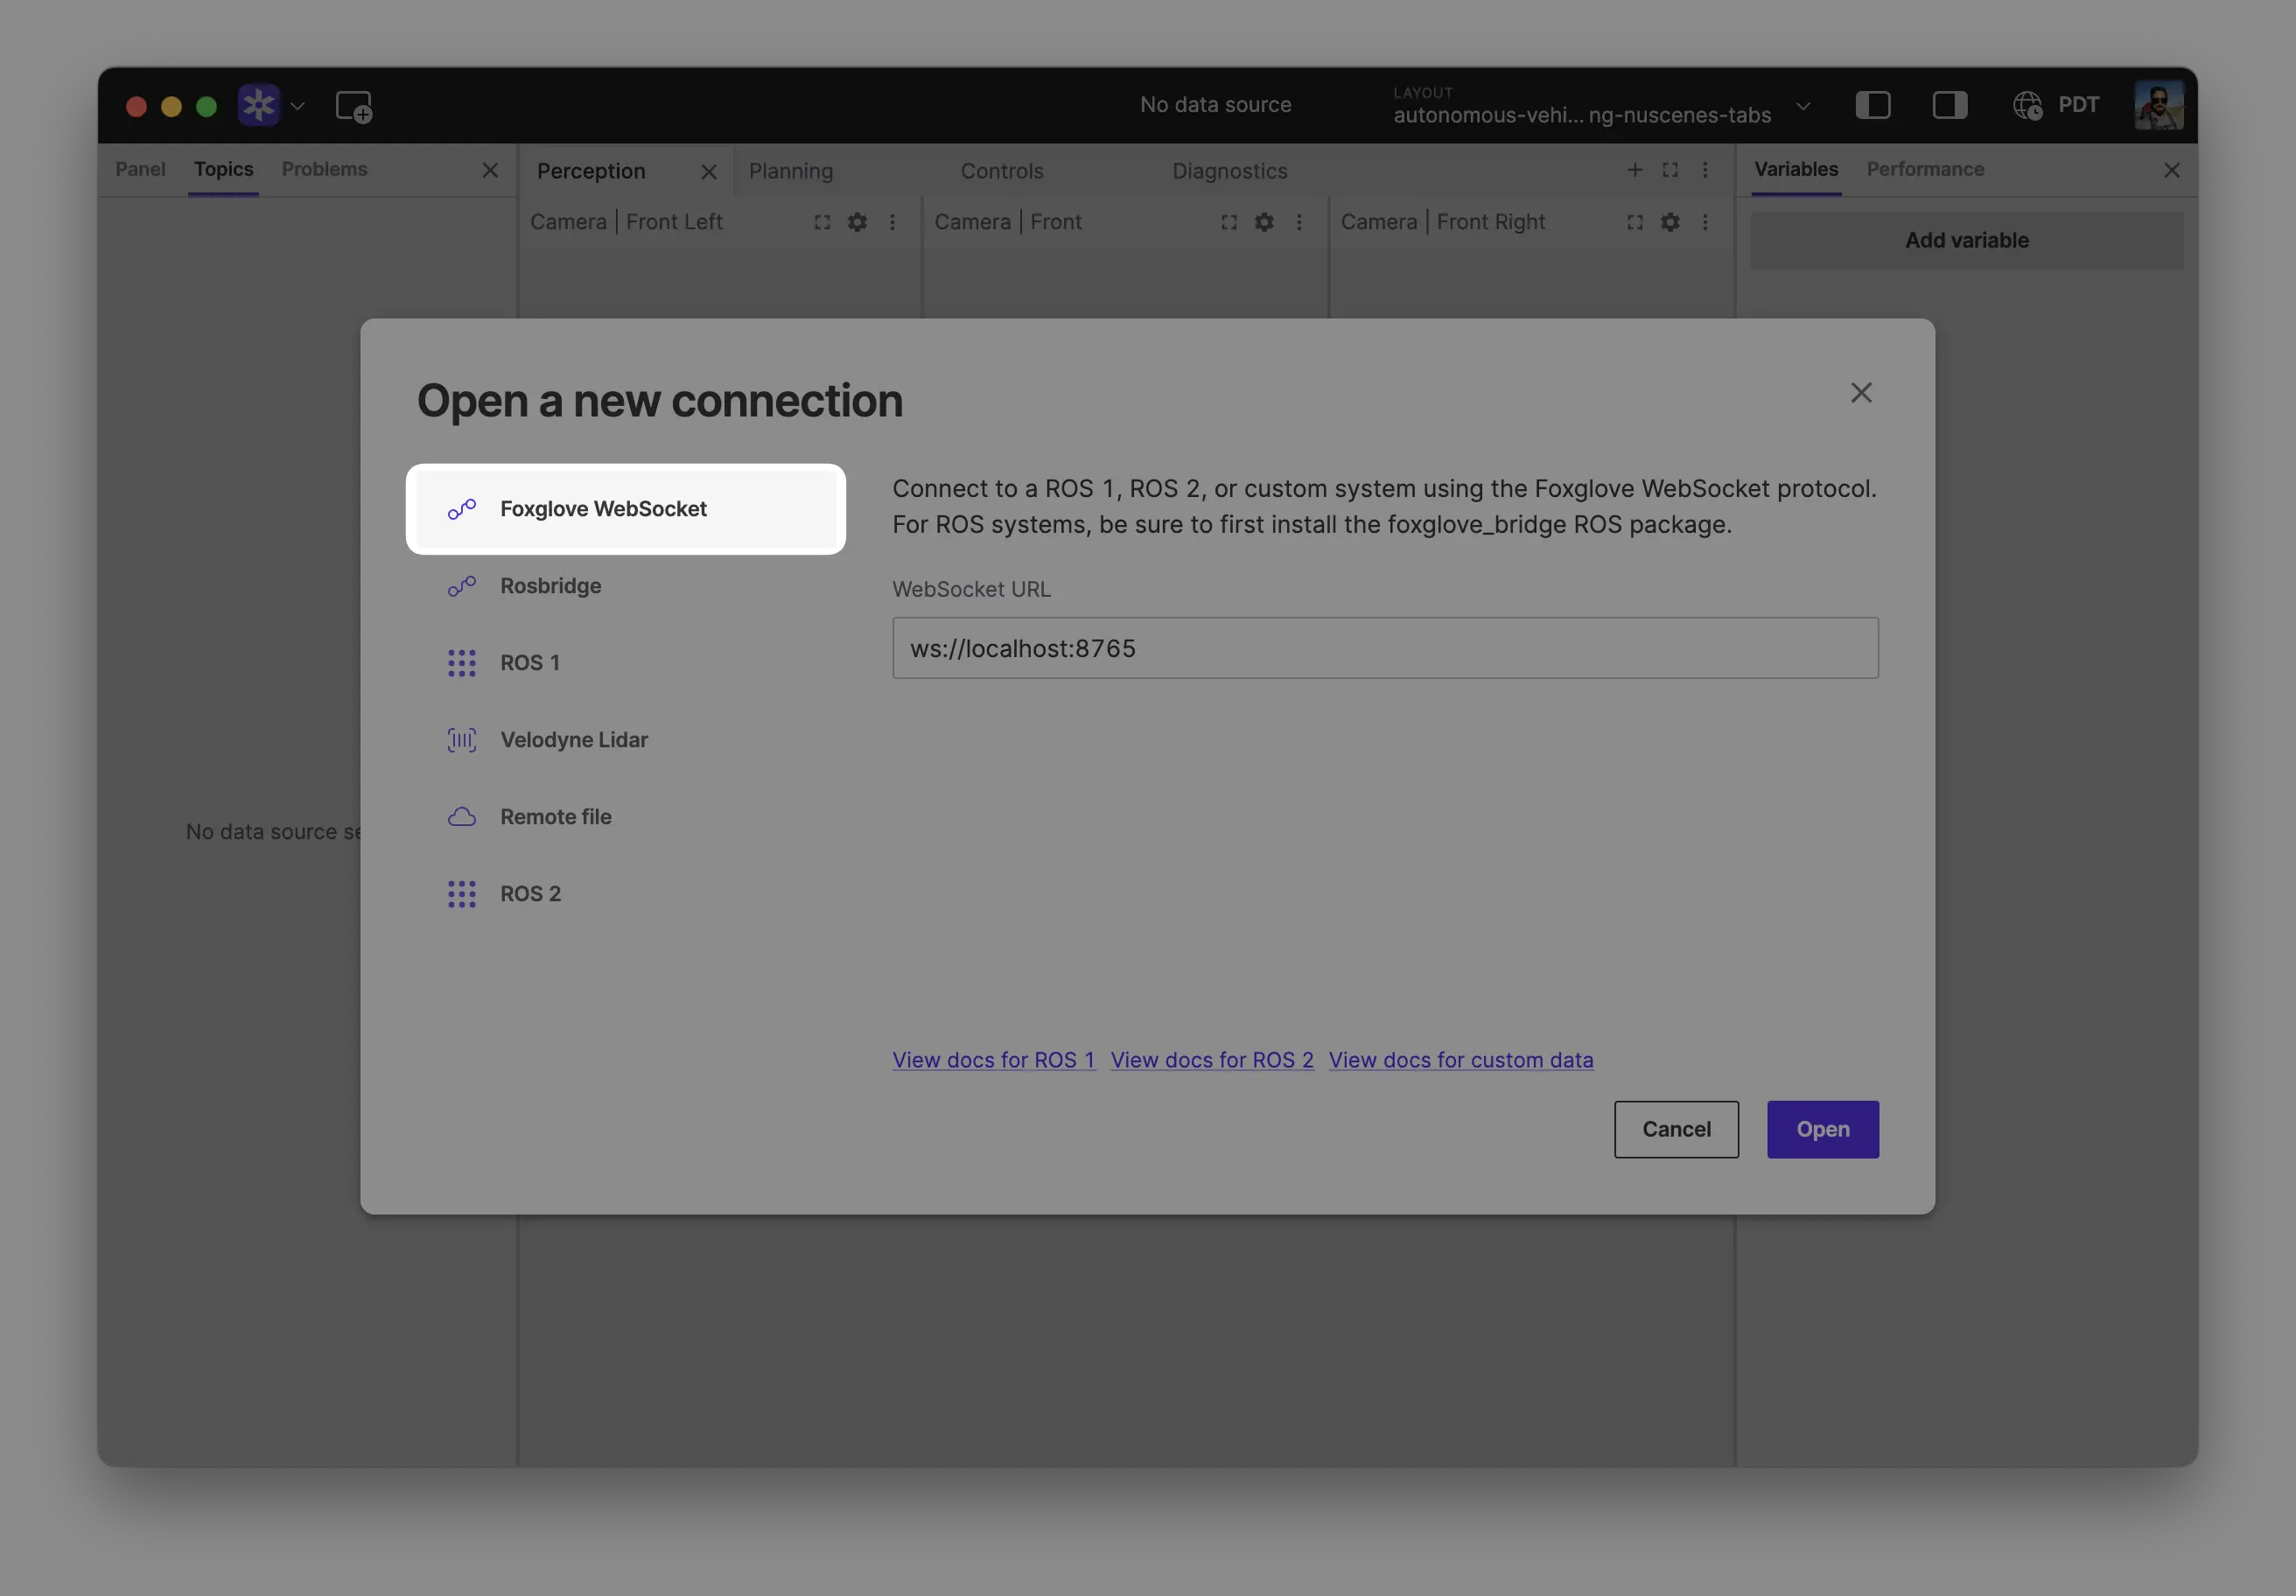
Click "Open" to connect.
Local development: Use ws://localhost:8765 when running the server on the same machine as Foxglove.
Robot connection: Use ws://ROBOT_IP:8765 when connecting to a server running on your robot, where ROBOT_IP is your robot's IP address on the network.
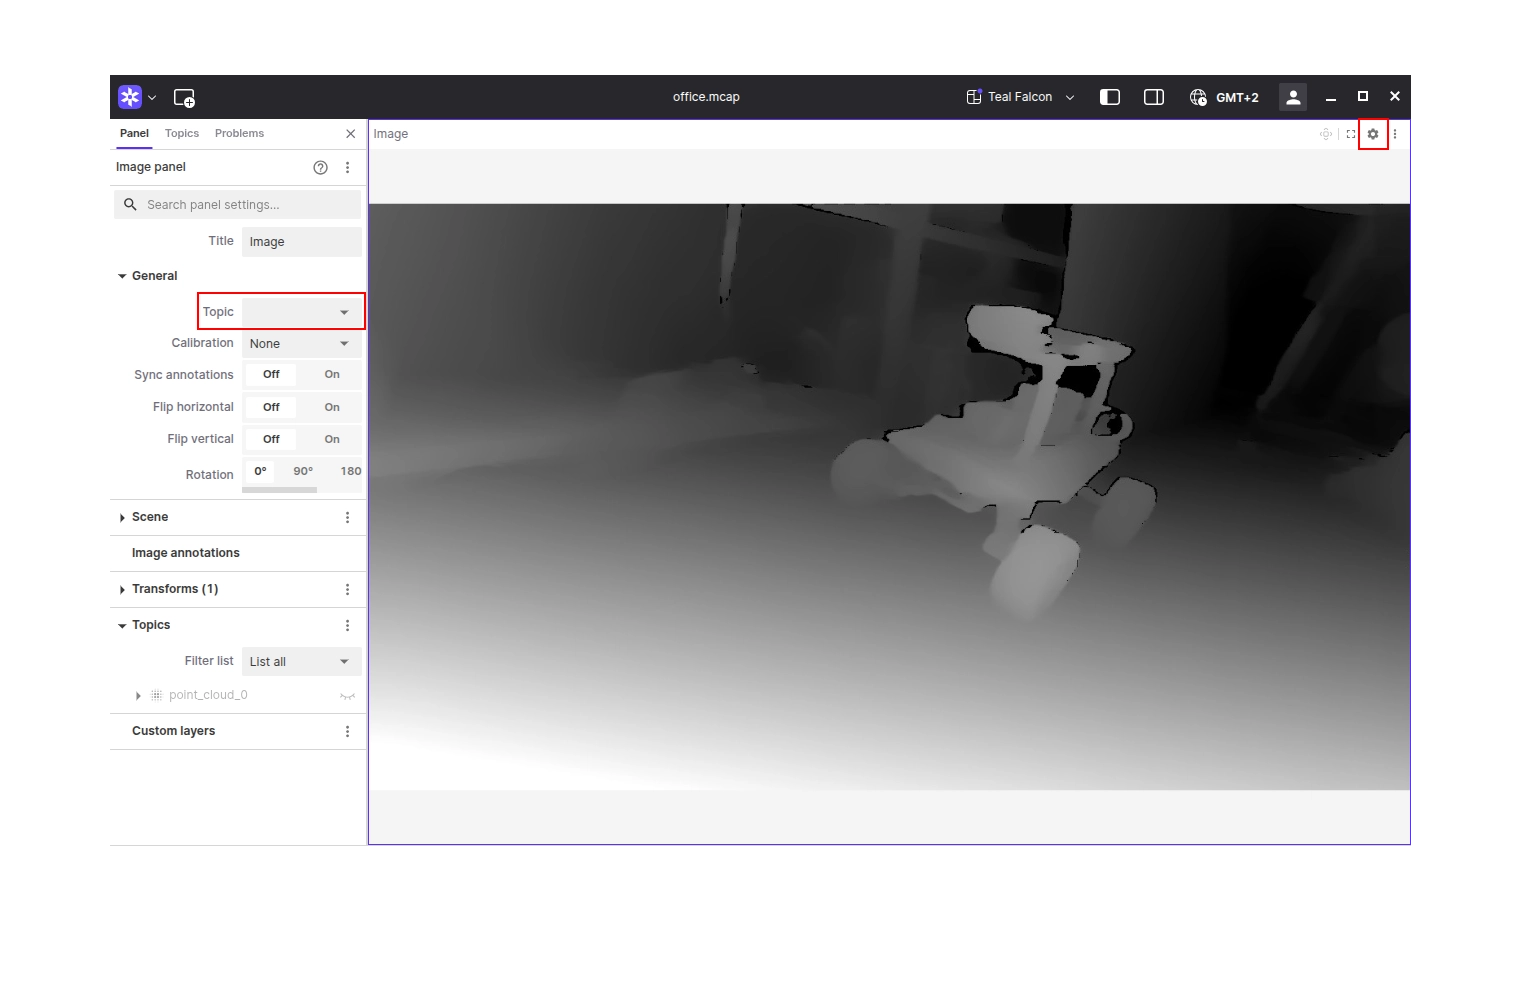
Visualize Camera Feed
Add an Image panel to your layout by clicking the Add panel button in the top left corner and selecting the Image panel.
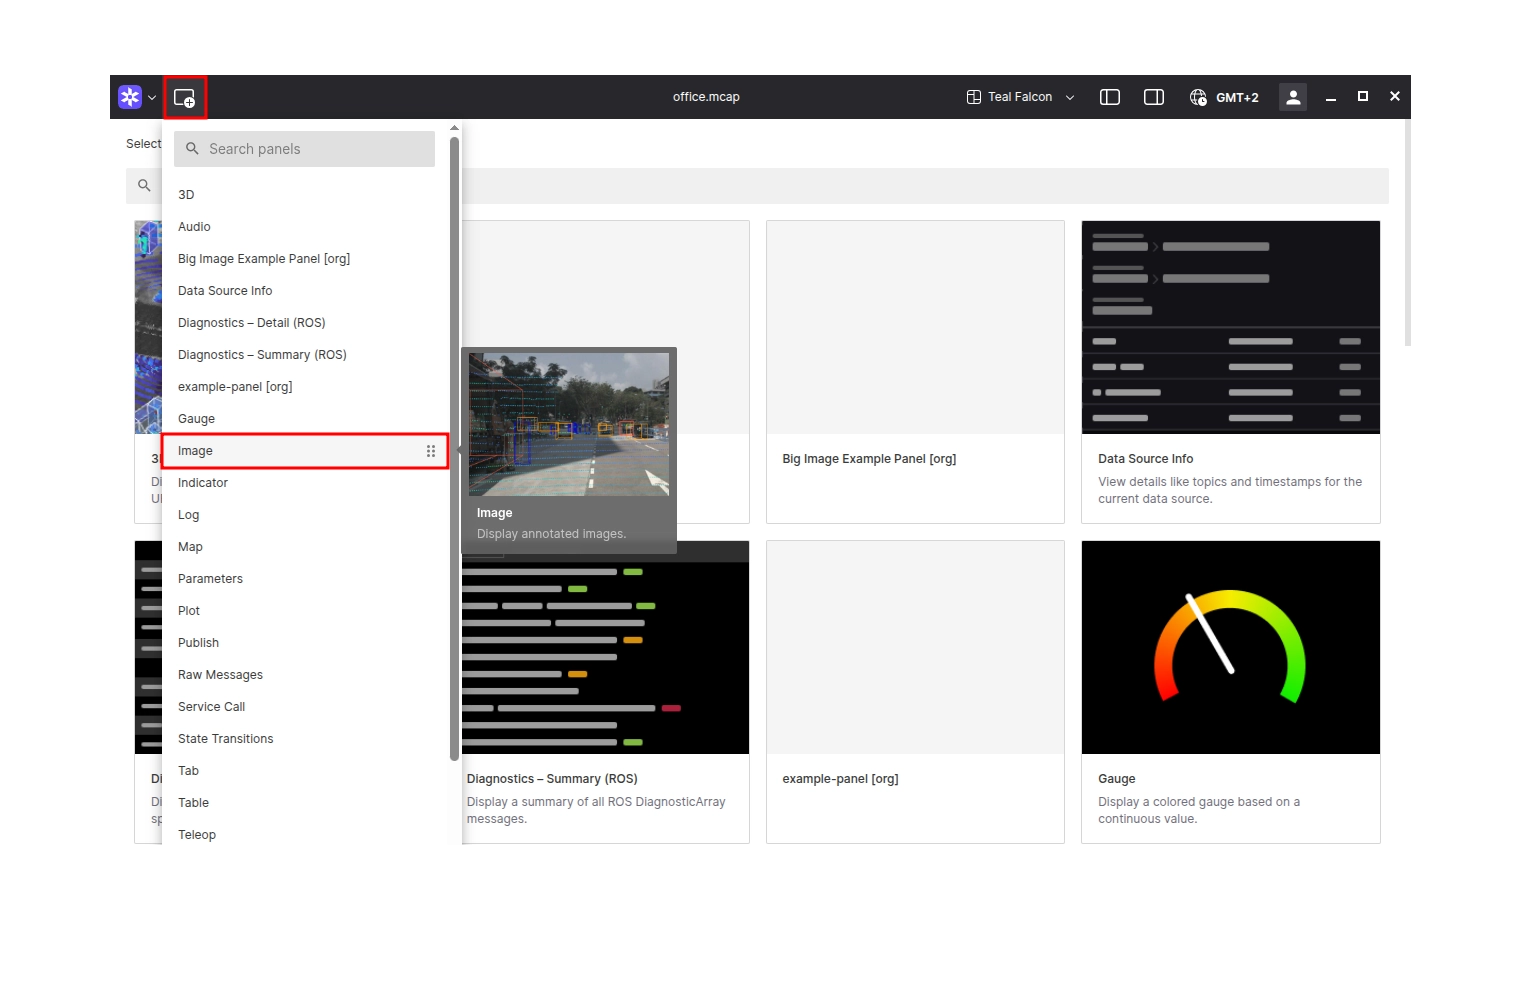
Configure the panel by selecting the appropriate image topic from the Topic dropdown in the panel settings.
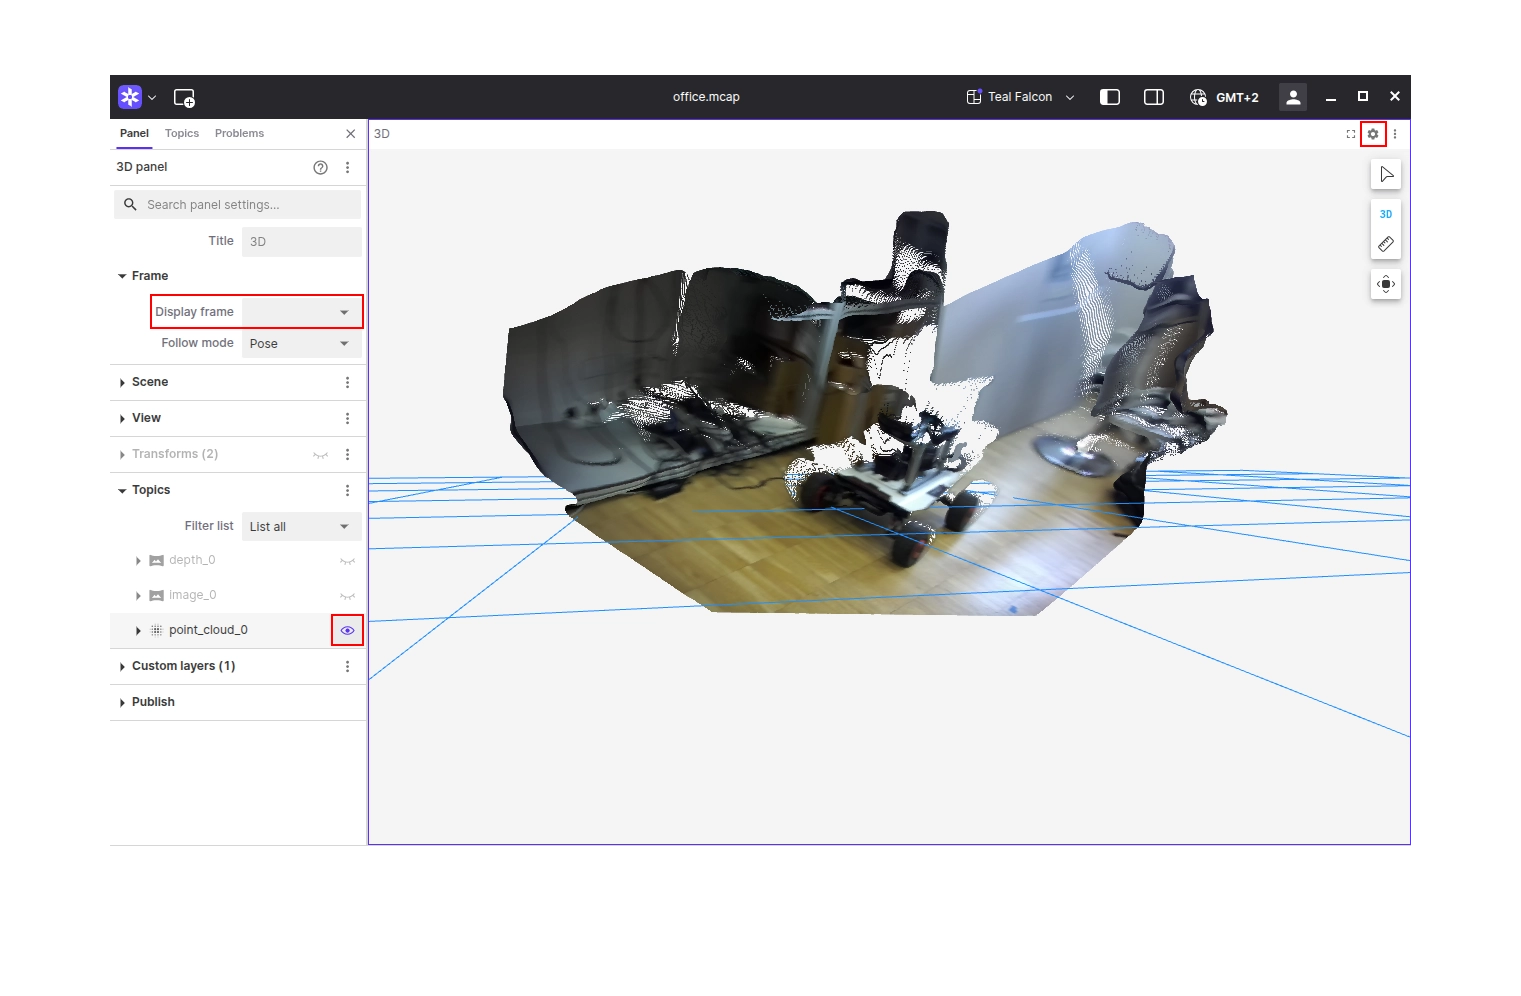
Visualize Point Cloud
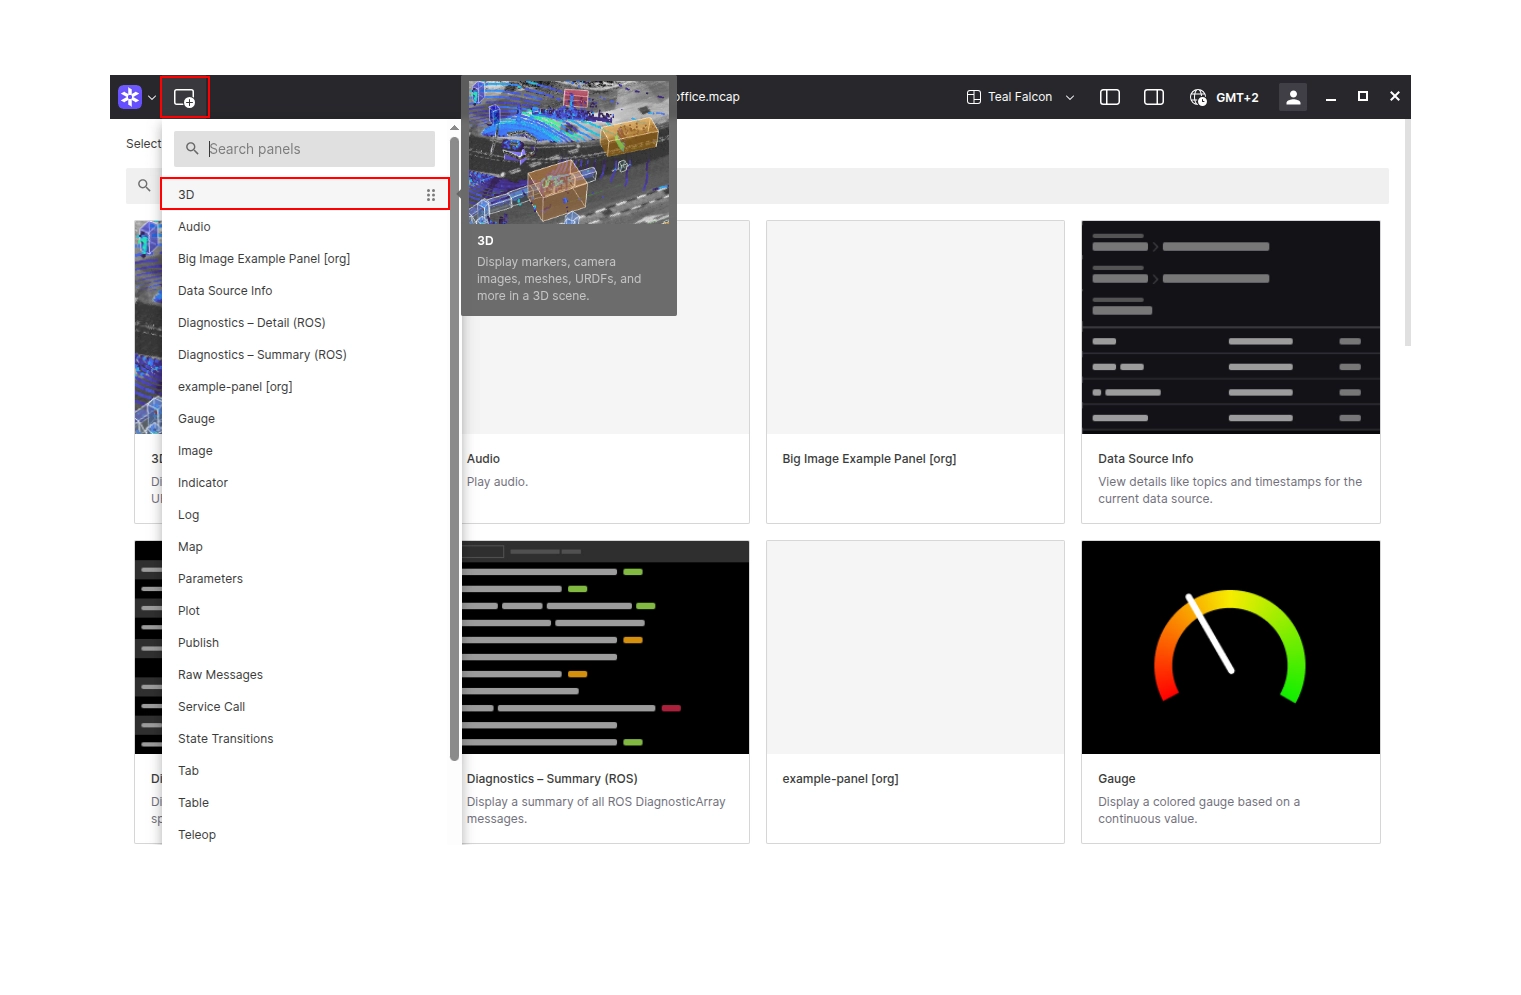
Add a 3D panel to your layout by clicking the Add panel button in the top left corner and selecting the 3D panel.
Learn More
- Explore Stereolabs Documentation
- Check out the ZED-Foxglove Repository
- Learn more about using Foxglove SDK