_Example_: `/path/to/workspace/src:/opt/ros/noetic/share`
_Note_: The `ROS_PACKAGE_PATH` environment variable will also be used. | ### Standalone license If your desktop installation uses standalone mode, see [Standalone license activation](/docs/standalone-license) for setup and activation instructions. ## Organization settings Admins can use the [Organization settings](https://app.foxglove.dev/~/settings/general) to modify the subscription plan, invite and manage organization members, and configure organization-wide settings like sites and custom device properties. ### General {#org-general} On the [General settings page](https://app.foxglove.dev/~/settings/general), admins can: - **Organization name** – Edit the organization name - **Default time zone** – Set the time zone used to render timestamps for organization members who haven't picked their own. Members can still override it from their personal [Time zone](#time-zone) menu; the override persists across sessions. - **Subscription** – View and modify plan details - **Approved domains** – New users signing in with email addresses from these domains are automatically added to the organization - **Usage** – Shows data storage usage - **Danger zone** – Delete the organization ### Members On the [Members settings page](https://app.foxglove.dev/~/settings/members), admins can: - View a list of all organization members (name, email address, last seen, [role](/docs/security/roles), [seat type](/docs/security/seat-types)) - Invite or remove organization members - Modify organization members' roles ("admin", "user") - Change a member's [seat type](/docs/security/seat-types) ("developer", "basic") :::note All organization members of Free plan organizations have the admin role. ::: ### Projects On the [Projects settings page](https://app.foxglove.dev/~/settings/projects), admins can: - Create new [Projects](/docs/projects) - Manage Project access - Rename and delete Projects ### Sites On the [Sites settings page](https://app.foxglove.dev/~/settings/sites), admins can: - Look up the status, name, and ID of their Foxglove- and self-hosted [Primary Sites](/docs/data/primary-sites) - Look up the status, name, and ID of their on-premises [Edge Sites](/docs/data/edge-sites) - Add Foxglove-hosted Primary Sites - Add Edge Sites ### Devices On the [Devices settings page](https://app.foxglove.dev/~/settings/devices), admins can set predefined metadata fields (i.e. [properties](/docs/data/devices#properties)) for the whole organization to associate with their devices. ### API keys On the [API keys settings page](https://app.foxglove.dev/~/settings/apikeys), admins can: - Generate API keys for accessing the [Foxglove API](/api) - Enable, disable, or permanently delete generated API keys - Configure the API key's capabilities per data resource (e.g. read-only for devices, read and write for recordings, etc.) ### Audit logs On the [Audit logs settings page](https://app.foxglove.dev/~/settings/audit-logs), Enterprise organization admins can review organization activity. The feed shows who performed an action, what they did, and when. See [Audit logs](/docs/audit-logs) for details. ### SSO On the [SSO settings page](https://app.foxglove.dev/~/settings/sso), admins can configure Okta SSO OIDC settings like the Okta domain, client ID, and more. Foxglove currently supports both [Microsoft](https://foxglove.dev/blog/announcing-microsoft-sign-in) and [Okta SSO](/docs/security/sso). ### Search On the [Search settings page](https://app.foxglove.dev/~/settings/search), admins can manage how [visual search](/docs/data/search#visual-search) indexing is configured. They can: - Manage which projects have visual search indexing enabled - Configure which topics are indexed for newly uploaded recordings - See the time range of recording data that has been indexed ### Webhooks On the [Webhooks settings page](https://app.foxglove.dev/~/settings/webhooks), admins can manage [Webhooks](/docs/webhooks) to subscribe to notifications about events that occur within Foxglove. ### Slack On the [Slack settings page](https://app.foxglove.dev/~/settings/slack), admins can add [Foxglove to their Slack workspace](/docs/agents/slack). Once it's installed, anyone in the workspace can ask Foxglove about their organization's data. ### Extensions On the [Extensions settings page](https://app.foxglove.dev/~/settings/extensions), admins can install Foxglove [extensions](/docs/extensions) across the organization to better support the team's unique workflows. Enabled extensions are automatically installed for all signed-in organization members. Use the `foxglove` CLI to [write](/docs/extensions#writing-an-extension) and [publish](/docs/extensions/publish) Foxglove extensions. ### Insights On the [Insights settings page](https://app.foxglove.dev/~/settings/insights), admins can understand how their team members are leveraging the platform. #### Import volume Track the net and cumulative volume of data your Foxglove organization has imported week-over-week:  Understand your team's data storage bill, whether you are nearing your plan's data limit, and the time periods during which the team imported the most data. --- ## Standalone License Activation **URL**: /docs/standalone-license **Description**: Activate Foxglove desktop in standalone mode for offline and air-gapped environments. Use standalone mode to run Foxglove desktop with a standalone license instead of signing in with an account. ## Before you begin Standalone mode is intended for offline and air-gapped workflows. In standalone mode: - Cloud-based pages and features are unavailable - Users do not sign in with an account - Users cannot sign out to switch accounts - [Preloaded layouts and extensions](#preload-layouts-and-extensions-optional) can be used but cannot be modified or removed To show the **Activate License** link on the welcome page, create a `standalone` folder in your Foxglove app data directory. After you create the folder, start Foxglove desktop and select **Activate License** on the welcome page. ## Activate online Use this flow when the machine can reach the internet. 1. Open **Activate License** from the welcome page. 2. Enter your license key. 3. Select **Activate**. ## Activate offline Use this flow for offline or air-gapped machines. 1. On the offline machine, open **Activate License**. 2. Select **use offline activation**. 3. Enter your license key and select **Generate .req file**. 4. Transfer the generated `.req` file to an online machine. 5. On the online machine, open [licensing.foxglove.dev](https://licensing.foxglove.dev/). 6. Upload the `.req` file and download the generated `.lic` file. 7. Transfer the `.lic` file back to the offline machine. 8. Using Foxglove on the offline machine, select **Import .lic file** and choose the `.lic` file. ## Preload layouts and extensions (optional) You can pre-configure standalone installations by placing files in subdirectories under `standalone`: ```text .../Foxglove/ └── standalone/ ├── layouts/ │ └── My Layout.json └── extensions/ └── mycompany.example-extension-1.0.0.foxe ``` - Put exported layout `.json` files in `standalone/layouts/` - Put extension `.foxe` files in `standalone/extensions/` Foxglove loads these files when a valid standalone license is active. ## Need help? Contact [support@foxglove.dev](mailto:support@foxglove.dev). --- ## Pricing **URL**: /docs/pricing **Description**: Foxglove offers Free, Pro, and Enterprise plans to fit teams of every size. Compare features, usage limits, and find the right plan for your workflow. Foxglove offers pricing plans for teams of any size, from individual developers to large organizations. Visit our [Pricing](https://foxglove.dev/pricing) page for an overview of the available plans. ## Managing your plan Organization admins can view and modify your plan from the [Billing settings](https://app.foxglove.dev/~/settings/billing) page. ## Tiered pricing Each plan includes a set amount of managed infrastructure, users, and devices. On Pro and Enterprise plans, additional usage is billed according to the marginal pricing tiers below. On Free and Academic plans, included usage is a hard limit. Prepaid committed-use credits are available on the Enterprise plan. To learn more, please [contact sales](https://foxglove.dev/contact?reason=sales). ## Data platform ### Included usage | Dimension | **Free** | **Pro / Enterprise** | **Academic** | | ------------- | --------- | -------------------- | ------------ | | **Storage** | 10 GB | 1 TB | 1 TB | | **Query** | 1 hour/mo | 1 hour/mo | 10 hours/mo | | **Indexing** | 100 GB/mo | 1 TB/mo | 1 TB/mo | | **Bandwidth** | 100 GB/mo | 100 GB/mo | 1 TB/mo | ### Storage Storage is priced per TB-month, calculated based on your average hourly data during the billing period. | Range | Rate | | ------------- | --------- | | First 1 TB | Included | | 1 - 10 TB | $50/TB/mo | | 10 - 100 TB | $40/TB/mo | | 100 TB - 1 PB | $30/TB/mo | | 1+ PB | $26/TB/mo | ### Query Query is calculated as the sum of execution time for all search, stream, and visualization data requests. | Range | Rate | | ---------------- | ---------- | | First 1 hour | Included | | 1 - 10 hours | $3.65/hour | | 10 - 100 hours | $2.75/hour | | 100 - 500 hours | $2.35/hour | | 500 - 1000 hours | $2.15/hour | | 1000+ hours | $2.05/hour | ### Indexing Indexing includes any data uploaded to Foxglove, or data indexed with [BYO Storage](/docs/data/primary-sites#foxglove-cloud-bring-your-own-storage). | Range | Rate | | ------------- | -------- | | First 1 TB | Included | | 1 - 10 TB | $35/TB | | 10 - 100 TB | $28/TB | | 100 TB - 1 PB | $24/TB | | 1+ PB | $22/TB | ### Bandwidth Bandwidth (egress) is charged for all data requests. | Range | Rate | | -------------- | -------- | | First 100 GB | Included | | 100 GB - 10 TB | $150/TB | | 10 - 100 TB | $135/TB | | 100 TB - 1 PB | $125/TB | | 1+ PB | $115/TB | ## Fleet ### Included usage | Dimension | Free | Pro / Enterprise | Academic | | ----------------- | ---- | ----------------- | -------- | | **Devices** | 5 | 5 | 10 | | **Remote access** | — | 300 min/device/mo | — | ### Devices Devices are only charged if they were active during the billing period. Additional devices are charged at $20/device/mo. ### Remote access Each device includes 300 remote access minutes per month (minutes are not pooled across devices). Additional minutes are charged at $0.05/min. ## AI agents ### Included usage Included usage is granted per user and is not pooled across users. | Dimension | **Free** | **Pro / Enterprise** | **Academic** | | ------------ | ---------- | -------------------- | ------------ | | **AI usage** | $5/user/mo | $5/user/mo | $5/user/mo | ### AI usage AI agent usage is measured by the tokens consumed by Large Language Model (LLM) requests, across both the agent sidebar and the Slack integration. When a user reaches their limit, behavior depends on the plan: - **Free and Academic**: included usage is a hard limit. The user is blocked from further AI agent usage until the monthly cycle renews, with no overage billing. - **Pro**: the user keeps working, and the organization is billed in arrears for that user's overage at the rate below. Overage is charged per user, so users still within their allowance are never billed. - **Enterprise**: AI overage is credit-gated rather than billed in arrears. It draws from the organization's prepaid credits, and once those run out, users are blocked until more are added. Usage includes input tokens (prompts and context), output tokens (AI responses), and prompt caching operations. | Range | Rate | | ---------------- | -------------------------- | | First $5/user/mo | Included | | Additional usage | Provider cost + $1.00/MTok | Provider costs vary by model and are passed through at cost. The Foxglove fee is a flat $1.00 per million tokens across all token types. --- ## Projects **URL**: /docs/projects **Description**: Projects are collections of resources within an organization. Projects provide data isolation and access control to collections of resources within an organization. Every [recording](/docs/data/recordings), [device](/docs/data/devices), and [event](/docs/data/events) belongs to one Project. ## What can you do with Projects? Projects enable you to organize data and control access within your organization. - Separate production and development workflows - Organize data by team or customer - Share subsets of data with specific members - Restrict third parties or external contractors to specific data within your Foxglove organization ## Creating a Project Every organization starts with a single shared Project that all members can access. Admins of enterprise organizations can create additional Projects from the [Projects page](https://app.foxglove.dev/~/settings/projects). :::warning Before creating a second Project, ensure all programmatic uploads specify a Project or existing device. See below. ::: ## Access control A Project can either be invite-only or shared. Invite-only Projects require explicit assignments for non-admin members, while shared Projects are available to all members of the organization. Admins can assign members to Projects via the [Members page](https://app.foxglove.dev/~/settings/members) and change the invite-only status of a Project via the [Projects page](https://app.foxglove.dev/~/settings/projects). - Members with the **user** role can only see and access shared Projects and Projects they are assigned to. - Members with the **admin** role can access all Projects. - API Keys can access all Projects. Projects are isolated. Data in one Project cannot be accessed from or moved to another Project. :::note [Pending imports](/docs/data/importing-data#track-pending-imports) not yet associated with a Project are only visible to admins via the [Pending Imports page](https://app.foxglove.party/~/settings/pending-imports). This can happen when uploads don't specify a device or Project ID — for example, at self-hosted sites where metadata isn't included during the upload. To ensure non-admin members can track their imports, always include a device or Project ID. ::: ## Associating data We recommend always providing a Project ID when interacting with Foxglove programmatically. For organizations with multiple Projects, a Project ID is required when creating devices or uploading recordings without an existing device. Project IDs can be found on the [Projects page](https://app.foxglove.dev/~/settings/projects). ### API requests Endpoints that create or list Project scoped resources accept a `projectId` field to specify the Project. See [API docs](/api) for more information. ### Self-hosted Primary Sites Providing a `foxglove_project_id` record in object metadata or a `projectId` in MCAP metadata associates the upload with a Project. See [Site docs](/docs/data/primary-sites/manage-data#adding-metadata-to-imports) for more information. Self-hosted Primary Sites support Projects as of [version 0.0.69](/docs/data/primary-sites/upgrading). ### Web and desktop apps Uploading files and creating devices from the Foxglove dashboard automatically associates them with the current Project. ## Project vs Organization scoped resources Every device, event, and recording belongs to a single Project. Data in one Project cannot be accessed from another Project. Resources at the organization level work across all Projects. | Resource | Project | Organization | | ----------------- | ------- | ------------ | | Devices | ✓ | | | Events | ✓ | | | Recordings | ✓ | | | API Keys | | ✓ | | Custom Properties | | ✓ | | Extensions | | ✓ | | Layouts | | ✓ | | Sites | | ✓ | | Webhooks | | ✓ | --- ## CLI **URL**: /docs/cli **Description**: The foxglove CLI tool helps you import, export, and interact with your data from the command line. The [Foxglove CLI tool](https://github.com/foxglove/foxglove-cli) helps you import, export, and interact with your data from the command line. ### Installation Download the latest release from your command line. | OS | architecture | command | | --- | --- | --- | | linux | | | amd64 | `curl -L https://github.com/foxglove/foxglove-cli/releases/latest/download/foxglove-linux-amd64 -o foxglove && chmod +x foxglove` | | | arm64 | `curl -L https://github.com/foxglove/foxglove-cli/releases/latest/download/foxglove-linux-arm64 -o foxglove && chmod +x foxglove` | | macos | | | any | Using [homebrew](https://brew.sh/): `brew install foxglove-cli` | | | amd64 | `curl -L https://github.com/foxglove/foxglove-cli/releases/latest/download/foxglove-macos-amd64 -o foxglove && chmod +x foxglove` | | | arm64 | `curl -L https://github.com/foxglove/foxglove-cli/releases/latest/download/foxglove-macos-arm64 -o foxglove && chmod +x foxglove` | | windows | | | amd64 | `curl -L https://github.com/foxglove/foxglove-cli/releases/latest/download/foxglove-windows-amd64.exe -o foxglove.exe` | | | arm64 | `curl -L https://github.com/foxglove/foxglove-cli/releases/latest/download/foxglove-windows-arm64.exe -o foxglove.exe` | After downloading the file, you may want to move it to a location in your system's `PATH` to make it more easily executable. To install a specific release, see the [releases page](https://github.com/foxglove/foxglove-cli/releases). ### Getting started Before interacting with your data, you must first authenticate with your [Foxglove account](https://app.foxglove.dev/signup): ```bash foxglove auth login ``` For a list of all available CLI commands: ```bash foxglove -h ``` Enable shell autocompletion for subcommands and parameters (`bash`, `zsh`, `fish`, and `PowerShell` are supported): ```bash foxglove completion
`Option` + `←` (macOS) | Seek backward 500ms | | `Alt` + `→` (Windows and Linux)
`Option` + `→` (macOS) | Seek forward 500ms | | `Home` (Windows and Linux)
`Fn` + `←` (macOS) | Seek to start | | `End` (Windows and Linux)
`Fn` + `→` (macOS) | Seek to end | | `Shift` + `↑` | Increase playback speed | | `Shift` + `↓` | Decrease playback speed | | `Ctrl` + `Shift` + `←` (Windows and Linux)
`Cmd` + `Shift` + `←` (macOS) | Set the range start to the current playback time (while adjusting the playback range) | | `Ctrl` + `Shift` + `→` (Windows and Linux)
`Cmd` + `Shift` + `→` (macOS) | Set the range end to the current playback time (while adjusting the playback range) | --- ## Comparison mode **URL**: /docs/visualization/comparison-mode **Description**: Open multiple data sources on a shared playback timeline and view their data together, either overlaid or side-by-side. You can open two or more data sources on a shared playback timeline while keeping each source distinct using **comparison mode**. This is useful when the sources share topics and you want to view the data together, either overlaid or side-by-side. For example, comparing a run before and after a code change, or aligning a simulation against a real-world log. Because comparison mode can pull data from different devices, it is an excellent fit for multi-device workflows. Select sessions and events from separate robots to unlock comparing like topics, overlaid or side-by-side. ## Starting a comparison On the Recordings, Sessions, or Events pages, select two or more items and click **Compare**.  To open local files straight into comparison mode, click **Compare local files** on the dashboard, **Compare local files…** in the nav menu under **Open data sources**, or run **Compare local files…** from the command palette, then select two or more files of the same type. Opening local files any other way — **Open local file(s)**, `Ctrl` + `O` / `Cmd` + `O`, or dragging files into Foxglove — merges them by default. To split a merged set into slots, open the Sources sidebar and set **Source mode** to **Compare** at the top, or run **Switch to compare** from the command palette. While a recording, session, or event is open, the command palette’s **Add comparison source…** command searches for another item of the same kind and adds it as a comparison slot. **Add source** adds local files to the current selection. ## Reading the comparison Each item you compare (such as a recording, session, or event) is a **source**. Each source occupies a **slot** labeled A, B, C, and so on, assigned in the order you select them. Slot badges appear next to the source name in the top bar, in Plot and State Transitions legends and series settings, in the Sources sidebar, and in the scrubber tooltip. Map represents each slot with a distinct color instead of a badge.  Some panels, such as [Plot](/docs/visualization/panels/plot#comparison-mode), [State Transitions](/docs/visualization/panels/state-transitions#comparison-mode), and [Map](/docs/visualization/panels/map#comparison-mode), are **multi-source**: they render every source at once. Others are **single-source**: they display one source at a time. Both types have a data source picker in the panel toolbar. Use it to focus a multi-source panel on one slot, or to switch a single-source panel between slots. Hovering a slot accents the matching slot and dims the other sources' data in multi-source panels, so you can pick out one source's data. The slot badges themselves stay visible. ## Adjusting a comparison Every source begins at time zero on the shared timeline, regardless of when it was originally recorded. Shift a source's start time to align two sources recorded at different real-world times. Open the Sources sidebar to: - **Add local files.** Click **Add** in the footer, or run **Add source** from the command palette. Local-file comparisons only. - **Add a cloud source.** Run **Add comparison source…** from the command palette and choose a recording, session, or event of the same kind. - **Remove a source.** Click **×** next to its heading and confirm, or run **Remove source…** from the command palette. - **Reorder slots and change start times.** Click **Manage** in the footer (or the compare icon on the playback bar), or run **Adjust comparison** from the command palette, to open the editor. Drag rows in the editor to reorder slots, type new offsets in each row's field, or drag each source's bar on the playback timeline to shift its start time. - **Switch merge and compare.** Use **Source mode** at the top of the Sources sidebar, or run **Switch to compare** / **Switch to merge** from the command palette. :::note Setting a source's start time before time zero re-anchors the whole set. The earliest source moves to zero, and every other source shifts by the same amount. ::: Hovering the playback scrubber shows the **Elapsed** time followed by each source's local timestamp.  --- ## Layouts **URL**: /docs/visualization/layouts **Description**: Arrange Foxglove panels into custom layouts to tackle your visualization and debugging workflows. :::note Authoring and editing layouts requires a [developer seat](/docs/security/seat-types). Members with a basic seat can view shared layouts. ::: With layouts, you can reuse a workspace for a recurring task or share it with a teammate solving a similar problem. A perception engineer may develop layouts for calibrating various sensors, a planning engineer may have a few for visualizing different routing algorithm outputs, and a controls engineer may build one for plotting robot kinematics. Use the "Layouts" menu to create, edit, and share layouts.  ### Personal layouts Personal layouts are accessible to only you – they cannot be viewed, loaded, or edited by anyone else. Saved changes to your personal layouts are synced across all your devices, and can be shared with your organization. #### Create Use the "Layouts" menu's "Create new layout" option to start building a custom workspace. Add and position [panels](/docs/visualization/panels), configure their settings, adjust [playback settings](/docs/visualization/playback), and set [variable](/docs/visualization/variables) values.  :::tip To organize multiple panels in your layout, use the [Tab panel](/docs/visualization/panels/tab) feature. Select multiple panels and choose "Group in tab" to instantly organize them without manual dragging. ::: #### Unsaved changes Changes you make to layouts are automatically tracked both in the desktop app and per-browser on web, but layouts must be saved to sync across different environments. When you have unsaved local changes to your layout you'll see a purple 'unsaved' indicator appear on the layout menu. From your layout's context menu you can: - **"Save changes"** – Save your locally stored changes. - **"Revert"** – Discard your unsaved changes and revert to the last explicitly saved layout version  #### Import and export Use a layout's context menu to "Export..." it as a JSON file. Use the "Layouts" menu's "Import from file..." option to load an exported layout JSON file. :::tip You can also copy individual tabs between layouts using the right-click context menu. See [Tab panel - Copying tabs between layouts](/docs/visualization/panels/tab#copying-tabs-between-layouts) for details. ::: #### Share Use a layout's context menu to "Share with team..." – this will make a personal layout accessible to your entire organization. #### Other Use each layout's context menu to view a history of changes, rename, duplicate, or delete any personal layout. To perform a batch action on multiple layouts: - Use `Cmd` to multi-select individual layouts - Use `Shift` to select a range of adjacent layouts - Right-click any selected layout's context menu to select a batch action ### Organization layouts Organization layouts allow teams to curate a set of canonical layouts to accomplish common tasks – e.g. for calibrating radar sensors, visualizing planning algorithm outputs, or viewing logs. Instead of maintaining marginally different setups for different tasks, organization members can use layouts pre-configured by workflow experts to avoid redundant work and accelerate development. Organization layouts work very similarly to personal layouts – i.e. you can view their history, rename, copy, export, and delete them – but operate more as templates than evolving snapshots of a workspace.  #### Unsaved changes Changes you make to layouts are automatically tracked both in the desktop app and per-browser on web, but layouts must be saved to sync across different environments and to update the shared layout for your organization. When you have unsaved local changes to your layout you'll see an 'unsaved' indicator appear on the layout menu. From your layout's context menu you can: - **"Save changes"** – Overwrite the organization layout with your changes - **"Revert"** – Discard your local changes and revert to the last explicitly saved layout version - **"Make a personal copy"** – Save your changes as a separate personal layout (reverts changes to organization layout) #### Share Use a personal layout's context menu to "Share with team..." – this will make it accessible to your entire organization. Organization layouts can be edited, renamed, or deleted by any team member. ### Layout History In the layout history sidebar you can compare your current draft to the most recently saved version of a layout and see who last saved the layout when. On Pro, Enterprise, and Academic plans, you can also browse a history of changes to your layouts and restore an older version if needed.  ### Layout Management The [layout manager](https://app.foxglove.dev/~/layouts) allows for individual or batch changes to layouts:  #### Add Use the **"Add"** button to either create a new layout or import an existing one.  - **"New Layout"** will prompt for a name, personal or organizational, and an optional folder to store the layout under:  - **"Import Personal Layout"** will prompt to select a layout JSON file from the computer's file system. #### Navigation Browsing layout folders can be performed directly from the left panel. They are categorized at the top level by: all, personal, and organizational. Additionally, navigation can be performed from the right panel by clicking a folder row to move into it, or by clicking the breadcrumb at the top of the right panel to move out of it. #### Searching & Filtering Searching and filtering can be performed from the top of the right panel. Providing values to these controls will limit the shown layouts in the currently selected folder or top level category to those that match. #### Individual Actions To perform similar actions from the layout menu, clicking the **"ellipsis"** button will provide a dropdown revealing them. The actions listed will depend on the layout type and status. Clicking **"Open"** will navigate you to visualization with the opened layout preselected.  #### Batch Actions Batch actions are performed by selecting at least one row using the checkboxes in the left most column. Once selected the actions will appear above the table.  ##### Move to Folder Only layouts of the same type, personal or organizational, can be selected to move to a new folder. Additionally, only a folder that exists under that same layout type can be chosen as a destination.  ### Layout data Saving a layout stores its full configuration in Foxglove's control plane, including panel settings such as topic and field names, so it can sync across your devices and be shared with your organization. Until you explicitly save a layout, your changes stay local to your browser or desktop app and aren't sent to Foxglove. If you don't want layout data stored in Foxglove's control plane, embed Foxglove in your own application and serve layouts from your own storage using [`selectLayout` and `getLayout`](/docs/embed/foxglove-embed#selectlayoutparams-selectlayoutparams-void). ### Layouts in Python notebooks You can create and use layouts programmatically in your [Jupyter-like notebooks](/docs/notebook). See the [Layouts API documentation](/docs/notebook/layouts) for details. --- ## Variables **URL**: /docs/visualization/variables **Description**: Variables are values that can be set globally for a Foxglove layout. Variables are values that can be set globally for a Foxglove layout and quickly update multiple panels at once. They can be set to a string, number, or boolean value. They can also be set to an array containing any of those primitive values (e.g. `["x", 2, false]`), or a map of strings to any of those primitive values (e.g. `{"x": 2, "y": false}`). Open the sidebar's "Variables" tab to view, add, and update variables.  ## Using variables Reference variables in Foxglove using a `$` prefix, for example `$my_global_var`. ### In expressions Panels that support [FoxQL](/docs/visualization/foxql) – like [Raw Messages](/docs/visualization/panels/raw-messages), [Plot](/docs/visualization/panels/plot), and [State Transitions](/docs/visualization/panels/state-transitions) – can reference variables to [slice](/docs/visualization/foxql#using-variables-to-slice) or [filter](/docs/visualization/foxql#using-variables-to-filter) data and dynamically decide what to visualize. You can leverage variables to quickly switch between subsets of your data – for example: - Create a `$my_ID` variable in the _Variables_ tab, and set its value to `101` - Type `/my_objects.objects[:]{id==$my_ID}` in a [Raw Messages panel](/docs/visualization/panels/raw-messages) to inspect the object whose `id` field equals `101` - Add `/my_objects.objects[:]{id==$my_ID}.velocity` as a y-axis value in a [Plot panel](/docs/visualization/panels/plot) to plot that same object's `velocity` ### In User Scripts Variables can be [referenced](/docs/visualization/user-scripts#using-global-variables), but not modified, in User Scripts. The user script receives all variables as an object every time it is called. ### In Foxglove Extensions Variables can be referenced in custom [extension panels](/docs/extensions) via the extension API [`RenderState`](/docs/extensions/extension-api/type-aliases/RenderState). ## Updating variables Variables can be updated directly or via user interactions in the [3D](/docs/visualization/panels/3d) panel or [Variable Slider](/docs/visualization/panels/variable-slider) panel. Foxglove extensions can also create or update variables via the extension API [`PanelExtensionContext`](/docs/extensions/extension-api/type-aliases/PanelExtensionContext). ## Controls and shortcuts - Type `]` to quickly open and close the right sidebar - Click input + `↑` – Increment numeric variable values - Click input + `↓` – Decrement numeric variable values --- ## User Scripts **URL**: /docs/visualization/user-scripts **Description**: Publish pseudo topics internally to Foxglove using custom scripts. Manipulate, reduce, and filter existing messages and output them for useful visualization. User scripts are custom in-app scripts (written in TypeScript) that transform messages. A user script can transform both playback and range-loaded. The result is output to a new topic. - **Playback data** – Messages streaming frame-by-frame into Foxglove; e.g. data for the [Raw Messages](/docs/visualization/panels/raw-messages) or [3D](/docs/visualization/panels/3d) panel - **[Range-loaded data](/docs/visualization/playback#range-loading)** – Messages for the entire data range being played back; e.g. data for the [Plot](/docs/visualization/panels/plot) or [State Transitions](/docs/visualization/panels/state-transitions) panels When transforming range-loaded data, Foxglove creates two instances of the running user script – one handles the full data range, while the other handles just the current playback frame of messages. Each instance of the user script receives the messages in [log time order](/docs/visualization/playback#message-ordering). :::tip User scripts are local to a layout. Use a **[message converter](/docs/extensions#message-converters)** to transform messages in a way that will apply to all layouts. ::: ## Getting started User Scripts are written in TypeScript. :::info TypeScript is a superset of JavaScript, so you can Google syntactic questions (e.g. how to manipulate arrays, or access object properties) using JavaScript terms, and semantic questions (e.g. how to make an object property optional) using TypeScript terms. ::: ### Writing your first script The user script editor can be found in the **User Scripts** tab in the right sidebar. Open the sidebar by pressing ] or use the command palette. Every script must declare 3 exports: - `inputs` – An array of input topics to transform - `output` – Name of the transformed output topic - `script` – A function that takes messages from input topics, transforms them, and then publishes messages on the output topic; must be the [default export](https://developer.mozilla.org/en-US/docs/web/javascript/reference/statements/export#description) Here is a basic script that echoes its input on a new output topic, `/foxglove_script/echo`: ```typescript export const inputs = ["/rosout"]; export const output = "/foxglove_script/echo"; export default function script(event: Input<"/rosout">): Message<"rosgraph_msgs/Log"> { return event.message; } ``` If you open a recording with a `/rosout` topic, you can now inspect the `/foxglove_script/echo` topic in the [Raw Messages panel](/docs/visualization/panels/raw-messages). When you create a new script, you’ll be presented with some boilerplate: ```typescript type Output = { hello: string }; export const inputs = ["/input/topic"]; export const output = "/foxglove_script/output_topic"; export default function script(event: Input<"/input/topic">): Output { return { hello: "world!" }; } ``` You’ll notice a few things: - The `Input` and `Message` types are imported from the `./types.ts` module, which provides helper types for your `Input` events and messages - The `Output` type has some default properties that the `script` function's output must adhere to `Input` is a generic type, meaning that it takes a parameter in order to be used. It is left empty on purpose as you'll need to populate it with the name of your input topic, e.g. `Input<"/rosout">`. :::note The input `event` is read-only. Do not modify the `event` object. ::: As for the `Output` type, you can either manually type out your output with the properties you care about (i.e. what is available in the boilerplate) or use one of the dynamically generated types from the `Message` type imported above. For instance, if you want to publish an array of markers, you can return the type `Message<"visualization_msgs/MarkerArray">`. It's not always obvious how message properties affect the visualized output – strictly typing your scripts helps you debug issues at compile time rather than at runtime. With that said, you can disable TypeScript checks when working on a rough draft of your script by adding `// @ts-expect-error` on the line above the one you want to ignore. ### Using multiple input topics In some cases, you will want to define multiple input topics: ```typescript export const inputs = ["/rosout", "/tf"]; export const output = "/foxglove_script/echo"; export default function script(event: Input<"/rosout"> | Input<"/tf">): { data: number[] } { if (event.topic === "/rosout") { // read event.message fields expected for /rosout messages } else { // read event.message fields expected for /tf messages } return { data: [] }; } ``` This snippet uses union types to assert that the message in the `script` function can take either a /rosout or /tf topic. Use an if/else clause to differentiate between incoming topics' schema names when manipulating messages. To combine messages from multiple topics, create a variable in your script's global scope to reference every time your `script` function is invoked. Check timestamps to make sure you are not publishing out-of-sync data. ```typescript export const inputs = ["/rosout", "/tf"]; export const output = "/foxglove_script/echo"; let lastReceiveTime: Time = { sec: 0, nsec: 0 }; const myScope: { tf?: Message<"tf2_msgs/TFMessage">; rosout?: Message<"rosgraph_msgs/Log"> } = {}; export default function script( event: Input<"/rosout"> | Input<"/tf">, ): { data: number[] } | undefined { const { receiveTime } = message; let inSync = true; if (receiveTime.sec !== lastReceiveTime.sec || receiveTime.nsec !== lastReceiveTime.nsec) { lastReceiveTime = receiveTime; inSync = false; } if (message.topic === "/rosout") { myScope.rosout = event.message; } else { myScope.tf = event.message; } if (!inSync) { return { data: [] }; } } ``` ### Using global variables The `script` function will receive all of the [variables](/docs/visualization/variables) as an object every time it is called. Each time a new message is received, the `script` function will be re-run with the latest variable values: :::note Global variables are read-only on user-scripts. Do not modify the `globalVars` parameter. ::: ```typescript type Output = {}; type GlobalVariables = { someNumericaVar: number }; export const inputs = []; export const output = "/foxglove_script/"; export default function script(event: Input<"/foo_marker">, globalVars: GlobalVariables): Output { if (event.message.id === globalVars.someNumericaVar) { // Message's id matches $someNumericaVar } return { data: [] }; } ``` ### Debugging User scripts are not executed unless the output topic is being used somewhere within your layout. To debug your script, first add a Raw Messages panel subscribing to the output topic to your layout. From there, you can either inspect the incoming topic directly, or invoke `log(someValue)` throughout the user script to print values to the _Logs_ section at the bottom of the panel. The only value you cannot `log()` is one that is, or contains, a function definition. You can also log multiple values at once, e.g. `log(someValue, anotherValue, yetAnotherValue)`. The following log statements will not produce any errors: ```typescript const addNums = (a: number, b: number): number => a + b; log(50, "ABC", null, undefined, { abc: 2, def: false }); log(1 + 2, addNums(1, 2)); ``` But these containing function definitions will: ```typescript log(() => {}); log(addNums); log({ subtractNums: (a: number, b: number): number => a - b }); ``` Invoking `log()` outside your `script` function will invoke it once, when your script is registered. Invoking `log()` inside your `script` function will log that value every time your `script` function is called. :::tip For topics publishing at a high rate, using `log()` can slow down the user script. Because a [Plot panel](/docs/visualization/panels/plot) will invoke the user script across all messages in the rendered time-range, `log()` output is not shown when plotting the output of a user script. In this case, use a [Raw Messages panel](/docs/visualization/panels/raw-messages) to view the output message instead. ::: ### Skipping output Do an early (or late) `return` in your function body when you don't want to publish. For example, let's say you only wanted to publish messages when a constant in the input is not 3: ```typescript export const inputs = ["/state"]; export const output = "/foxglove_script/manual_metrics"; export default function script(event: Input<"/state">): { metrics: number } | undefined { if (event.message.constant === 3) { // Do not publish any message return; } return { // Your data here }; } ``` In TypeScript, if you return without a value, it will implicitly return `undefined`. Note the union return type for the `script` function – we've indicated to TypeScript that this function can return `undefined`. ### Using Foxglove message types Import and use types from the [`@foxglove/schemas`](https://github.com/foxglove/foxglove-sdk) package in user scripts: ```typescript export const inputs = ["/imu"]; export const output = "/s_script/json_data"; type Output = { color: Color; pose: Pose }; export default function script(event: Input<"/imu">): Output { return { color: { r: 1, g: 1, b: 1, a: 1 }, pose: { position: { x: 1, y: 1, z: 1 }, orientation: { x: 1, y: 1, z: 1, w: 1 } }, }; } ``` ## Utilities The script selector includes a **Utilities** section with functions that can be imported into any script (e.g. `import { compare } from "./time.ts"`). The `types.ts` utility file is generated from the currently loaded data source, and contains type definitions for all found schemas. :::info Add custom utilities by creating an extension. See [Guide: Register a user-script utility](/docs/extensions/guides/register-user-script-utility) for more details. Extension utilities appear under **Extension Utilities** in the script selector. ::: ## Templates The script selector's **From template** section includes boilerplate for writing common scripts, like one that publishes a `MarkerArray`. ## Settings | General | | | ----------------------- | ------------------------------------------- | | **Auto-format on save** | Auto-format the code in your script on save | ## Controls and shortcuts Press `Cmd` + `s` to save script changes. ## TypeScript Resources - [Basic Types](https://www.typescriptlang.org/docs/handbook/2/basic-types.html) - [Gitbook](https://basarat.gitbook.io/typescript/getting-started/why-typescript) ## When to use a user script or a topic converter extension User scripts and [topic converter extensions](/docs/extensions#message-converters) have similar capabilities, but there are key differences in how they are authored, shared, and how they support third-party packages. | | **User scripts** | **Topic converters** | | ----------------------------- | ---------------- | -------------------- | | **Data transformation** | ✅ | ✅ | | **Create new topics** | ✅ | ✅ | | **Edit directly in Foxglove** | ✅ | ❌ | | **Scoped to a layout** | ✅ | ❌ | | **Reusable across layouts** | ❌ | ✅ | | **Shareable with your team** | ❌ | ✅ | | **Written in your IDE** | ❌ | ✅ | | **Part of your codebase** | ❌ | ✅ | | **Use third-party packages** | ❌ | ✅ | --- ## FoxQL **URL**: /docs/visualization/foxql **Description**: Use FoxQL throughout Foxglove to select and transform values from topics. FoxQL is an expression language for selecting and transforming data in Foxglove. FoxQL expressions can name a topic, navigate into its fields, and transform output. Use FoxQL wherever Foxglove asks for an expression — for example in the Plot, Raw Messages, State Transitions, Gauge, and Indicator panels, and in search conditions. :::note FoxQL was previously referred to as "message path syntax". :::
@rpy.yaw) for scalar value; ** Timestamp x-axis only.
Use `.@functionname` syntax, with an optional operand for functions that accept one:
```json
/imu.linear_acceleration.x.@abs
/wheel.speed.@mul(3.6)
/joint_states.position.@length
/imu.linear_acceleration.@norm
```
The sections below define each function (including vector magnitude, quaternion/RPY, and time-series behavior), plus [chaining functions](#functions-chaining) for how suffixes combine. Panel docs summarize what each panel supports and link here for full definitions.
### Scalar {#functions-category-scalar}
Scalar functions align with JavaScript's Math functions where applicable.
Angles use radians unless you convert with [`@degrees`](#functions-degrees) or [`@radians`](#functions-radians).
### Operand {#functions-category-operand}
Operand functions accept one numeric argument in parentheses. Values can also come from [variable references](/docs/visualization/variables).
### Array {#functions-category-array}
Use [`@length`](#functions-length) to return the JavaScript `.length` of an array or typed array:
```json
/joint_states.position.@length
/markers.markers.@length
```
The function returns `0` for an empty array. Use the function suffix syntax (`.@length`) for arrays; field access like `.length` is reserved for message objects that actually define a field named `length`.
Previously, paths ending in `.length`, `.byteLength`, or `.buffer` on an array or typed array value resolved to the underlying JavaScript property. Those paths no longer resolve and should be migrated to `.@length` for length lookups; the other properties have no FoxQL equivalent.
### Vector {#functions-category-vector}
Computes the Euclidean norm (magnitude) of an object with `x`, `y` (and optionally `z`) numeric properties, or of a numeric array:
```json
/imu.linear_acceleration.@norm
/gps.velocity.@norm
/joint_states.velocity.@norm
```
### Struct {#functions-category-struct}
[`@rpy`](#functions-rpy), [`@ypr`](#functions-ypr), and [`@yrp`](#functions-yrp) convert a quaternion — the standard `(x, y, z, w)` form, with `x`, `y`, `z` the vector part and `w` the scalar part, describing a rotation in right-handed 3D space — into `roll`, `pitch`, and `yaw` Euler angles in radians. They differ only in the order the rotations are composed. In `@ypr` and `@yrp`, `yaw` is the rotation about the fixed Z axis (world-frame heading); in `@rpy`, `yaw` is measured in the body frame after roll and pitch. Append field access (for example, `.yaw` or `.roll`) for a scalar result, and chain [`@degrees`](#functions-degrees) to convert to degrees.
XYZ Euler order — intrinsic rotations about X (roll), then Y (pitch), then Z (yaw).
```json
/odom.orientation.@rpy
/odom.orientation.@rpy.yaw
```
ZYX Euler order — intrinsic rotations about Z (yaw), then Y (pitch), then X (roll).
```json
/odom.orientation.@ypr
/odom.orientation.@ypr.yaw
```
ZXY Euler order — intrinsic rotations about Z (yaw), then X (roll), then Y (pitch).
```json
/odom.orientation.@yrp
/odom.orientation.@yrp.yaw
```
**Ranges and wrapping** (applies to [`@rpy`](#functions-rpy), [`@ypr`](#functions-ypr), and [`@yrp`](#functions-yrp)). These functions recover a representative set of angles, not a continuously accumulated one. Each returns the middle axis of its sequence in the range **[−π/2, π/2]** (pitch for `@rpy` and `@ypr`, roll for `@yrp`) and the other two axes in **(−π, π]**; no output ever falls outside ±π. A quaternion encodes only orientation, so an angle whose natural value lies outside these ranges folds back into them — for example a yaw of 270° is reported as −90°. As an orientation rotates continuously, the outer angles therefore wrap, jumping between +180° and −180°: the conversion is evaluated independently per sample with no unwrapping, so expect a sawtooth rather than a continuously accumulating heading. At the middle-axis singularity (pitch = ±90° for `@rpy` and `@ypr`, roll = ±90° for `@yrp`) the remaining two axes are degenerate (gimbal lock); the combined rotation is reported on one axis with the other set to 0, and values near the singularity can change sharply.
Converts an RPY object (`roll`, `pitch`, `yaw` in radians) to a quaternion, as the inverse of [`.@rpy`](#functions-rpy) using the same XYZ Euler convention.
```json
/odometry.euler.@quat
/odometry.euler.@quat.w
```
Append field access (for example, `.w`) when you need a scalar numeric result.
### Time-series {#functions-category-time-series}
When an expression includes filters, time-series modifiers use consecutive samples that match the filter (for example, `/imu{sensor_id==3}.@timedelta`; see [`@timedelta`](#functions-timedelta)).
Change between consecutive samples.
In the Plot panel with a **timestamp** x-axis, plots the change in y-value between consecutive samples: `y[n] - y[n-1]`.
Rate of change between consecutive samples.
In the Plot panel with a **timestamp** x-axis, plots the rate of change in y-value: `(y[n] - y[n-1]) / (t[n] - t[n-1])`. The time values `t` come from the series' **Timestamp** setting (Log time, ROS header stamp, Publish time, or a custom field timestamp path).
Elapsed time in seconds between consecutive samples.
In the Plot panel with a **timestamp** x-axis, plots elapsed time in seconds between consecutive samples: `t[n] - t[n-1]`. The time values `t` come from the series' **Timestamp** setting.
See the [Plot panel](/docs/visualization/panels/plot#functions) for timestamp sources, filter behavior with consecutive samples, and valid or invalid chains that mix time-series functions with other modifiers.
### Chaining functions {#functions-chaining}
The sections above define each function on its own. To combine them, append additional `.@` functions so each step receives the output of the previous one. Evaluation is left-to-right.
```json
/odom.orientation.@rpy.yaw.@degrees
/odom.orientation.@rpy.roll.@abs
```
For example, [`@rpy`](#functions-rpy) with field access [`.yaw`](#functions-rpy), then [`@degrees`](#functions-degrees), as in the path `.@rpy.yaw.@degrees`, extracts yaw from a quaternion orientation and converts radians to degrees in one expression.
Time-series functions ([`@delta`](#functions-delta), [`@derivative`](#functions-derivative), [`@timedelta`](#functions-timedelta)) have extra rules: at most one may appear in a chain, and only [scalar functions](#functions-category-scalar) may follow it. How filters interact with consecutive samples for those modifiers is covered in the note under the [Time-series](#functions-category-time-series) category above. See the [Plot panel](/docs/visualization/panels/plot#functions) for valid and invalid examples with time-series functions in a chain.
---
## Shareable links
**URL**: /docs/visualization/shareable-links
**Description**: Build and share deep links with your teammates to open Foxglove with specific layouts, data sources, and timeline views.
Build and share deep links with your teammates to open Foxglove with specific layouts, data sources, and timeline views.
To open Foxglove using a specific layout or data source, construct a "deep link" URL using the format:
```text
https://app.foxglove.dev/~/view?param1=value1¶m2=value2
```
Supported query parameters are documented below, or you can copy any URL while you are using the app.
## Web vs. desktop
By default, links will open in the browser. You can open the desktop app instead using the `openIn` parameter:
| parameter | type | required | description |
| --------- | ------ | -------- | ----------------------------- |
| `openIn` | string | | `web` (default)`desktop` | `openIn=desktop` opens in the Foxglove app. If it is not installed, it presents a landing page that prompts the user to download the app or open the link in the browser. This is the preferred approach to open the Foxglove app. The `foxglove://` URL scheme also opens in the Foxglove app. This fails silently if the Foxglove app is not installed. | prefix | example | | --- | --- | | `https://app.foxglove.dev/~/view` | https://app.foxglove.dev/~/view?ds=foxglove-websocket&ds.url=ws://localhost:8765&openIn=desktop | | `foxglove://open` | foxglove://open?ds=foxglove-websocket&ds.url=ws://localhost:8765 | ## Layouts To load a saved layout (personal or team): | parameter | type | required | description | | ---------- | ------ | -------- | ----------------------------------------- | | `layoutId` | string | ✓ | Foxglove's ID for a remotely saved layout | To get a URL with the correct `layoutId` param, open the web app and click your desired layout in the "Layouts" menu. ## Timestamp | parameter | type | required | description | | --- | --- | --- | --- | | `time` | timestamp
([RFC3339](https://datatracker.ietf.org/doc/html/rfc3339)) | | Timestamp to seek to (for non-live data sources) | ## Data sources To specify your data source, use the `ds` parameter as documented according to your desired data source below. For example, a Rosbridge connection may look like the following: ```text https://app.foxglove.dev/~/view?ds=rosbridge-websocket&ds.url=ws%3A%2F%2Flocalhost%3A9090&layoutId=2644147b-f205-456c-ace9-69466aaac0b7 ``` ### Foxglove WebSocket | parameter | type | required | description | | --------- | ------ | -------- | ------------------------------------------ | | `ds` | string | ✓ | `foxglove-websocket` | | `ds.url` | string | ✓ | WebSocket URL (i.e. `ws://localhost:8765`) | ### Rosbridge | parameter | type | required | description | | --------- | ------ | -------- | ------------------------------------------ | | `ds` | string | ✓ | `rosbridge-websocket` | | `ds.url` | string | ✓ | WebSocket URL (i.e. `ws://localhost:9090`) | ### ROS 1 Native (Supported on desktop only) | parameter | type | required | description | | --- | --- | --- | --- | | `ds` | string | ✓ | `ros1-socket` | | `ds.url` | string | ✓ | [ROS Master URI](http://wiki.ros.org/ROS/EnvironmentVariables#ROS_MASTER_URI) | ### Foxglove | parameter | type | required | description | | --- | --- | --- | --- | | `ds` | string | ✓ | `foxglove-stream` | | `ds.deviceId` | string | See below\* | The device id in Foxglove | | `ds.deviceName` | string | See below\* | User assigned device name | | `ds.start` | timestamp
([RFC3339](https://datatracker.ietf.org/doc/html/rfc3339)) | | Start of data playback range | | `ds.end` | timestamp
([RFC3339](https://datatracker.ietf.org/doc/html/rfc3339)) | | End of data playback range | | `ds.recordingId` | string | See below\* | ID of the recording to open | | `ds.recordingKey` | string | See below\* | Key of the recording to open | | `ds.eventId` | string | See below\* | ID of the event to open | | `ds.sessionId` | string | See below\* | ID of the session to open | | `ds.sessionKey` | string | See below\* | Key of the session to open | :::info One of `ds.deviceId`, `ds.deviceName`, `ds.recordingId`, `ds.recordingKey`, `ds.eventId`, `ds.sessionId`, or `ds.sessionKey` is required. If multiple are provided, Foxglove uses the first one in this order: `ds.recordingId`, `ds.recordingKey`, `ds.deviceId`, `ds.deviceName`, `ds.eventId`, `ds.sessionId`, `ds.sessionKey`. ::: ### Remote files | parameter | type | required | description | | --- | --- | --- | --- | | `ds` | string | ✓ | `remote-file` | | `ds.url` | string | ✓ | URL to `.bag` or `.mcap` file(s). Use multiple parameter entries to specify multiple files. (i.e. `ds.url="…"&ds.url="…"`) | ### Remote data loader | parameter | type | required | description | | --- | --- | --- | --- | | `ds` | string | ✓ | `remote-data-loader` | | `ds.dataLoaderUrl` | string | ✓ | URL of your remote data loader deployment (for example `https://loader.example/`). | | `ds.manifestParams` | string | | Encoded [manifest](/docs/visualization/connecting/cloud-data/remote-data-loader#manifest-endpoint) query parameters (application/x-www-form-urlencoded, without a leading `?`). Example: `ds.manifestParams=recording%3Dfirst-recording`. When present, sibling `ds.*` keys are ignored. | | `ds.*` | string | | **Legacy.** Sibling manifest parameters when `ds.manifestParams` is omitted (for example `ds.recording=…`). Prefer `ds.manifestParams`. | | `ds.compare` | string | | Set to `true` to compare multiple sources. Requires two or more `ds.manifestParams` values. | ## Timeline To share links to the timeline view, use the format: ```text https://app.foxglove.dev/~/timeline?param1=value1¶m2=value2 ``` ### Time range Set the time range displayed on the timeline. Defaults to the last 7 days if omitted. | parameter | type | required | description | | --- | --- | --- | --- | | `start` | timestamp
([RFC3339](https://datatracker.ietf.org/doc/html/rfc3339)) | | Start of the displayed time range | | `end` | timestamp
([RFC3339](https://datatracker.ietf.org/doc/html/rfc3339)) | | End of the displayed time range | ### Device filter Filter which devices are shown on the timeline. | parameter | type | required | description | | -------------- | ------ | -------- | -------------------------------------- | | `deviceFilter` | string | | Filter displayed devices by name or ID | ### Device selection Highlight a time range on a specific device. These parameters are applied on load and then removed from the URL. | parameter | type | required | description | | --- | --- | --- | --- | | `selectedDevice` | string | | Device ID or name | | `selectedStart` | timestamp
([RFC3339](https://datatracker.ietf.org/doc/html/rfc3339)) | | Start of the selected range | | `selectedEnd` | timestamp
([RFC3339](https://datatracker.ietf.org/doc/html/rfc3339)) | | End of the selected range | --- ## Video export **URL**: /docs/visualization/video-export **Description**: Record the current panel layout to an MP4 or WebM file by stepping through your data one frame at a time. Video export records the current panel layout to a video file by stepping the player one frame at a time and capturing the layout's panels after each update. Use it to share a playback session, embed a clip in a report, or view recordings without having to wait for high-bandwidth data buffering. :::note Video export is available only on Enterprise plans, only in the [desktop app](https://foxglove.dev/download), and only for recorded data sources. Live data sources are not supported. ::: ## Export process 1. Open a recording in the desktop app and arrange your layout exactly as you want it to appear in the video. 2. Open the data source dropdown in the top bar and select **Export video**, or open the command palette and run the **Export video** command. 3. Review and configure the export parameters in the dialog and click **Start export**. 4. Choose where to save the video in the file dialog that appears. The video is written directly to this file as the export runs. Dismissing the dialog cancels the export and leaves the parameters dialog open. 5. A progress chip will appear over the playback bar and the panel layout will be locked for the duration of the export. To stop early, click the "Cancel export" button on the chip; the file keeps the frames captured so far and remains a valid, shorter video. 6. When the export finishes, a toast confirms completion (or surfaces an error). If an error occurs after at least one frame was encoded, Foxglove attempts to finalize the captured frames into a valid, shorter video and leaves it at the chosen destination. If no frames were encoded or the partial video cannot be finalized, Foxglove attempts to remove the unusable output file. ## Export parameters | Field | Description | | --- | --- | | Start time (s) | Inclusive start of the playback range, in seconds from the data source epoch. Defaults to the start of the active data source. | | End time (s) | Inclusive end of the playback range, in seconds. Defaults to the end of the active data source. | | Frame rate (fps) | Output video frame rate, between 1 and 120. Defaults to 24. Fractional values are rounded. Higher frame rates produce smoother video and longer export times. | | Playback speed | Multiplier for how much player time is captured per output video frame. `1x` records 1 second of player time per 1 second of video. `2x` and `5x` produce shorter videos that cover the same player time range. | | Format | `MP4 (H.264)` or `WebM (VP9)`. MP4 is preferred for editor compatibility; WebM is the fallback when your browser cannot encode H.264. Formats your browser cannot encode are disabled in the dropdown. | | File name | Suggested output file name for the save dialog. The matching extension (`.mp4` or `.webm`) is appended automatically. You can change the name and location in the save dialog before the export starts. | | Wait for range loading to finish before exporting | Enabled by default. Waits for [range loading](/docs/visualization/playback#range-loading) on the active data source to finish before the first frame is captured, so panels render against fully-loaded data. Disable to start capturing immediately; early frames may not show video keyframes in image panels loaded or plots and state transition panels not fully loaded. | The dialog reports the total number of frames it will record and the approximate output duration based on the current settings. When you start the export, a save dialog prompts you for the destination file, and the video is streamed directly to that file as it records. ## What gets captured Video export captures the **panel layout area** of the workspace at the size it is currently rendered. The playback bar, top navigation, and sidebars are not included in the frame, but their size affects the dimensions of the captured area. To get a clean, predictable output: - Resize the app window to the resolution you want for the final video before starting the export. - Minimize or close the left and right sidebars. - Don't resize the window or interact with the app while the export is running. :::tip Frames are captured at your display's device pixel ratio, so a HiDPI/Retina display produces a higher-resolution video for the same window size. To target a specific output resolution, switch to a display (or a window size) that matches. ::: ### Foxglove watermark Every exported video has a "Made with Foxglove" wordmark composited into the top-right corner of the frame. The watermark is rendered on top of the captured pixels at a fixed position and opacity and is part of every video that ships from this version of the desktop app. It cannot currently be repositioned, resized, or disabled from the UI. ## Troubleshooting ### The Export video menu item is disabled The data source menu's **Export video** item is disabled outside the desktop app and outside Enterprise plans. The command palette hides **Export video** when it is unavailable. The menu tooltip explains which gate applies: - "Video export is only available on Enterprise plans." — switch to an Enterprise seat to enable the feature. - "Video export is available only in the desktop app." — download the [desktop app](https://foxglove.dev/download) and reopen the recording there. If you don't see the menu item at all, the current data source is a live connection. Video export only applies to recorded data sources. ### "Selected video format is not supported by this browser" The browser/system did not advertise WebCodecs support for the selected codec. Switch to the other format (the dropdown disables formats your system cannot encode), or restart the desktop app to retry the capability probe. ### Export takes a long time Export time grows with the time range, the frame rate, and the cost of rendering each frame. To speed up an export: - Reduce the time range to only the portion you need. - Lower the frame rate (24 fps is a good baseline; 60 fps roughly doubles the export time). - Use a higher playback speed multiplier (`2x` or `5x`) to cover the same player range in fewer frames. - Close any expensive panels you do not need in the recording (large 3D scenes, dense plots, etc.) before starting. ### Export looks blurry or the wrong size Frames are captured at your display's device pixel ratio. The output video matches the panel layout area in device pixels (rounded to even numbers). To target a different size, resize the app window — or move it to a different display — before starting the export. The dialog and the progress chip do not show the output dimensions, but the encoded file reports them in its metadata. --- ## Open via CLI **URL**: /docs/visualization/open-via-cli **Description**: Open local, live, and cloud data sources via the command line. [Install the desktop app](https://foxglove.dev/download) to open local, live, and cloud data sources via the command line. ## Local files Once you've installed the desktop app, Foxglove will be the default handler for `.mcap` files. Depending on your operating system, you can open a local file using: ## Live and cloud data sources To open live and cloud data souces from CLI, call `foxglove://open` with any [shareable link](/docs/visualization/shareable-links). For example: This will open the desktop app and connect to `ws://myrobot:8765/` over the Foxglove websocket protocol. :::tip Make sure to wrap the URL in double quotes (") to prevent the shell from interpreting special characters. ::: --- ## Annotate ROS enum fields **URL**: /docs/visualization/annotate-ros-enum-fields **Description**: Annotate your ROS message definitions' enum fields for optimal visualization in Foxglove. ROS messages do not have built-in support for enums, but there are two ways Foxglove can treat constant values as enums: using a separate enum message, or with inline annotations. ## Separate enum messages Traditionally, ROS messages would declare enums by placing named constants in a message definition with a field of the same type. For example, a `PrimaryColor` message might be defined as follows: ```text # In color_msgs/PrimaryColor.msg: uint8 RED=1 uint8 YELLOW=2 uint8 BLUE=3 uint8 data ``` Then another message type could use the `PrimaryColor` type for one of its fields: ```text # In color_msgs/Object.msg color_msgs/PrimaryColor color ``` Foxglove will see that `PrimaryColor` defines the constants for `RED`, `YELLOW`, and `BLUE` adjacent to the `data` field, and they all have the matching `uint8` type, so it will display the named constants alongside the raw value. For example, in the [Raw Messages](/docs/visualization/panels/raw-messages) and [State Transitions](/docs/visualization/panels/state-transitions) panels:  :::tip Separate enum messages require extra indirection when accessing the value, such as `.color.data`. Use inline annotations to avoid this issue. ::: ## Inline enum annotations Foxglove also allows you to _annotate_ enum fields without introducing a separate message for indirection. To annotate an enum field, convert it to its primitive type (such as `uint8`). Then, **add another field named with a `_foxglove_enum` suffix** that uses the enum schema, on the line before the field definition: ```text # In color_msgs/Object.msg: color_msgs/PrimaryColor color_foxglove_enum uint8 color ``` Double underscores (`__foxglove_enum`) are also supported, although they are only valid syntax in ROS 1. You can now remove the `data` field from the enum message, so it has no fields. In ROS 1, the annotation will have no impact on serialization since the enum message is now empty. In ROS 2, empty messages do introduce an extra padding byte in serialization. ```text # In color_msgs/PrimaryColor.msg: uint8 RED=1 uint8 YELLOW=2 uint8 BLUE=3 ``` Now, the color value is stored directly in `.color` rather than `.color.data`. Foxglove will recognize the annotation and display the `PrimaryColor` constant names in the [Raw Messages](/docs/visualization/panels/raw-messages) and [State Transitions](/docs/visualization/panels/state-transitions) panels:  --- ## Controls and shortcuts **URL**: /docs/visualization/shortcuts **Description**: Use keyboard shortcuts and mouse interactions to navigate the visualization interface. Summary of keyboard shortcuts and mouse interactions. ## Playback controls
| Shortcut | Description | Command |
|---|---|---|
| `Space` | Toggle playback |
player.togglePlayback
|
| `←` | Seek backward 100ms |
player.seekBackwardMedium
|
| `→` | Seek forward 100ms |
player.seekForwardMedium
|
| `Shift` + `←` | Seek backward 10ms |
player.seekBackwardSmall
|
| `Shift` + `→` | Seek forward 10ms |
player.seekForwardSmall
|
|
`Alt` + `←` (Windows and Linux) `Option` + `←` (macOS) |
Seek backward 500ms |
player.seekBackwardLarge
|
|
`Alt` + `→` (Windows and Linux) `Option` + `→` (macOS) |
Seek forward 500ms |
player.seekForwardLarge
|
| `Home` | Seek to the start of the data |
player.seekStart
|
| `End` | Seek to the end of the data |
player.seekEnd
|
| `Shift` + `↑` | Increase playback speed |
player.speedUp
|
| `Shift` + `↓` | Decrease playback speed |
player.speedDown
|
|
`Ctrl` + `e` (Windows and Linux) `Cmd` + `e` (macOS) |
Open the create event dialog |
player.createEvent
|
|
`Shift` + `Alt` + `←` (Windows and Linux) `Shift` + `Option` + `←` (macOS) |
Move an event endpoint left to the current playback time (while editing an event) |
player.snapEventTimeLeft
|
|
`Shift` + `Alt` + `→` (Windows and Linux) `Shift` + `Option` + `→` (macOS) |
Move an event endpoint right to the current playback time (while editing an event) |
player.snapEventTimeRight
|
|
`Shift` + `Alt` + `←` (Windows and Linux) `Shift` + `Option` + `←` (macOS) |
Move a playback range endpoint left to the current time (while adjusting the range) |
player.trimRangeLeft
|
|
`Shift` + `Alt` + `→` (Windows and Linux) `Shift` + `Option` + `→` (macOS) |
Move a playback range endpoint right to the current time (while adjusting the range) |
player.trimRangeRight
|
| Shortcut | Description | Command |
|---|---|---|
|
`Ctrl` + `K` (Windows and Linux) `Cmd` + `K` (macOS) |
Open the [command palette](/docs#command-palette) |
global.commandPalette.toggle
|
|
`Ctrl` + `O` (Windows and Linux) `Cmd` + `O` (macOS) |
Open the [file picker](/docs/visualization/connecting/local-data) |
global.datasource.openFile
|
|
`Ctrl` + `Shift` + `O` (Windows and Linux) `Cmd` + `Shift` + `O` (macOS) |
Open the [connection picker](/docs/visualization/connecting/live) |
global.datasource.openConnection
|
|
`Ctrl` + `J` (Windows and Linux) `Cmd` + `J` (macOS) |
Open or close the agent sidebar |
global.chat.toggleOpen
|
| Shortcut | Description | Command |
|---|---|---|
|
`Ctrl` + `A` (Windows and Linux) `Cmd` + `A` (macOS) |
Select all panels in the current layout or tab. |
panel.selectAll
|
Hover on panel + ` (backtick)
|
Show panel shortcuts (remove from layout or split) |
| Shortcut | Description | Command |
|---|---|---|
| `,` | Toggle the panel settings sidebar |
panel.settings.toggleOpen
|
| While inside input + `↑` | Increment numeric panel setting values | |
| While inside input + `↓` | Decrement numeric panel setting values | |
| Click input + drag right | Increment numeric panel setting values | |
| Click input + drag left | Decrement numeric panel setting values |
| Shortcut | Description | Command |
|---|---|---|
| `[` | Toggle left sidebar |
sidebar.left.toggleVisibility
|
| `]` | Toggle right sidebar |
sidebar.right.toggleVisibility
|
| Shortcut | Description |
|---|---|
|
`Ctrl` + `t` (Windows and Linux) `Cmd` + `t` (macOS) |
New tab |
|
`Ctrl` + `w` (Windows and Linux) `Cmd` + `w` (macOS) |
Close tab |
| `Ctrl` + `Tab` | Next tab |
| `Ctrl` + `Shift` + `Tab` | Previous tab |
|
`Ctrl` + `/` (Windows and Linux) `Cmd` + `/` (macOS) |
Go to last active tab |
|
`Ctrl` + `[` (Windows and Linux) `Cmd` + `[` (macOS) |
Navigate back |
|
`Ctrl` + `]` (Windows and Linux) `Cmd` + `]` (macOS) |
Navigate forward |
| Shortcut | Description | Command |
|---|---|---|
| `KeyW` | Move camera forward |
panel.threeDee.moveForward
|
| `KeyA` | Move camera to the left |
panel.threeDee.moveLeft
|
| `KeyS` | Move camera backward |
panel.threeDee.moveBackward
|
| `KeyD` | Move camera to the right |
panel.threeDee.moveRight
|
| `Shift`+`KeyW` | Rotate camera up |
panel.threeDee.rotateUp
|
| `Shift`+`KeyA` | Rotate camera left |
panel.threeDee.rotateLeft
|
| `Shift`+`KeyS` | Rotate camera down |
panel.threeDee.rotateDown
|
| `Shift`+`KeyD` | Rotate camera right |
panel.threeDee.rotateRight
|
| Scroll | Zoom in and out | |
| Drag | Move camera parallel to the ground (x-y plane) | |
|
`Alt` + drag (Windows and Linux) `Option` + drag (macOS) |
Move camera parallel to the screen (enable z-axis) | |
| `Shift` + drag, or right-click-drag | Rotate the camera around the target position | |
| `1` | Re-center the camera on the chosen target frame |
panel.threeDee.resetCamera
|
| `3` | Toggle between 2D bird's-eye view and 3D perspective view |
panel.threeDee.togglePerspective
|
| `i` | Show or hide the object inspector |
panel.threeDee.toggleInspector
|
| Scroll | Zoom |
| Shortcut | Description | Command |
|---|---|---|
| Scroll | Default zoom for plot type | |
|
Scroll with mouse over y-axis Scroll + `Shift` |
Zoom the y-axis only | |
|
Scroll with mouse over x-axis Scroll + `Alt` (Windows and Linux) Scroll + `Option` (macOS) |
Zoom the x-axis only | |
|
Scroll + `Shift` + `Alt` (Windows and Linux) Scroll + `Shift` + `Option` (macOS) |
Zoom both axes | |
| `r` (when panel is selected) | Reset view to original viewport |
panel.plot.resetView
|
| `z` (when panel is selected) | Toggle zoom tool |
| Shortcut | Description | Command |
|---|---|---|
|
`Ctrl` + `Enter` (Windows and Linux) `Cmd` + `Enter` (macOS) (when the JSON editor is focused) |
Publish the configured message from the JSON editor |
| Shortcut | Description | Command |
|---|---|---|
|
`Alt` + `[` (Windows and Linux) `Option` + `[` (macOS) (when panel is selected) |
Step to the previous message |
panel.stepBackward
|
|
`Alt` + `]` (Windows and Linux) `Option` + `]` (macOS) (when panel is selected) |
Step to the next message |
panel.stepForward
|
| Shortcut | Description | Command |
|---|---|---|
| Scroll | Zoom | |
| Scroll + `Shift` | Scroll vertically | |
| `r` (when panel is selected) | Reset view to original viewport |
panel.stateTransitions.resetView
|
| `z` (when panel is selected) | Toggle zoom tool |
| Shortcut | Description |
|---|---|
| Scroll | Zoom |
| Shortcut | Description |
|---|---|
| `Cmd` + `s` | Save script changes |
Cross-Origin Resource Sharing (CORS) setup
To load remote data files, you must host your files in a server or cloud provider that supports Cross-Origin Resource Sharing (CORS) and accepts range requests. When loading remote data into Foxglove for playback and analysis, we recommend hosting your files in a cloud provider like [Amazon Simple Storage Service (S3)](https://aws.amazon.com/pm/serv-s3/), [Google Cloud Storage (GCS)](https://cloud.google.com/storage), or [Azure Storage](https://azure.microsoft.com/en-us/product-categories/storage/). You can also host files on your own server, but it may be difficult and time-consuming to set up support for [Cross-Origin Resource Sharing (CORS)](https://web.dev/cross-origin-resource-sharing/) and [range requests](https://developer.mozilla.org/en-US/docs/Web/HTTP/Range_requests). If your data is sensitive, generate and use a signed URL – make sure that you point to the resource directly, as redirects will not work with CORS: - **S3** – [Sharing objects using presigned URLs](https://docs.aws.amazon.com/AmazonS3/latest/userguide/ShareObjectPreSignedURL.html) - **GCS** – [Signed URLS](https://cloud.google.com/storage/docs/access-control/signed-urls) - **Azure Storage** – [Grant limited access to Azure Storage resources using shared access signatures (SAS)](https://docs.microsoft.com/en-us/azure/storage/common/storage-sas-overview) This signed URL will work for a limited period of time. You can set up your server to only sign URLs for authenticated users. Finally, set up your CORS configuration. Check out the following example of a [Terraform](https://www.terraform.io/) config for an S3 bucket ([docs](https://registry.terraform.io/providers/hashicorp%20%20/aws/latest/docs/resources/s3_bucket_cors_configuration)): ```terraform cors_rule { allowed_methods = ["GET", "HEAD", "OPTIONS"] allowed_origins = ["https://app.foxglove.dev", "https://embed.foxglove.dev"] allowed_headers = ["*"] expose_headers = ["ETag", "Content-Type", "Accept-Ranges", "Content-Length"] } ``` And a Terraform config for a GCS bucket ([docs](https://registry.terraform.io/providers/hashicorp/google/latest/docs/resources/storage_bucket#cors)): ```terraform cors { origin = ["https://app.foxglove.dev", "https://embed.foxglove.dev"] method = ["GET", "HEAD", "OPTIONS"] response_header = ["ETag", "Content-Type", "Accept-Ranges", "Content-Length"] } ```Flat: solid color
Color map: pre-defined color palette
Gradient: smooth transition between two custom colors
RGBA (separate fields): use embedded color from each cell's `red`, `green`, `blue`, and `alpha` fields (see below)
Note: only `Color Map` and `Gradient` are currently supported for `GridMap` messages | | Flat color | Only shown if "Color mode" is set to "Flat"; hex code for color of each cell | | Color field
Color layer | Only shown if "Color mode" is not set to "Flat"; numeric field in message used for coloring logic | | Color map | Only shown if "Color mode" is set to "Color map"; "Turbo" (Google) or "Rainbow" (RViz); for mapping "Color field" values to colors | | Gradient | Only shown if "Color mode" is set to "Gradient"; The two colors to interpolate between, based on the "color field" | | Opacity | Only shown if "Color mode" is set to "Color map" or "BGR (packed)"; sets alpha value for all cells | | Value min | Only shown if "Color mode" is not set to "Flat" and the message is not a `GridMap` schema; minimum value used to normalize incoming grid's "Color field" values | | Value max | Only shown if "Color mode" is not set to "Flat" and the message is not a `GridMap` schema; maximum value used to normalize incoming grid's "Color field" values | | Elevation field
Elevation layer | Optional field to displace each grid cell in the Z axis; if not set, elevation is 0 for all cells | | Interpolation method | Only shown if "Elevation" is set; either Linear or Nearest Neighbor. Determines how elevation and color values are sampled spatially across the grid. | | Show lines | Only shown if "Elevation" is set; whether to render subtle grid cell borders | | Line color | Only shown if "Show lines" is enabled; color of the cell grid lines | | Lighting | Only shown if "Elevation" is set; enables shading from simulated directional lighting, based on elevation surface normals | | Frame lock | "On" means the grid is locked to the frame specified by its `frame_id`, and will move as that frame's transforms change. "Off" means the grid is relative to the fixed frame and will not move after it is first displayed | | Draw behind | "On" means the grid is rendered before the rest of the scene, so it appears behind other scene elements regardless of their relative depth. "Off" means the grid is rendered normally | ##### RGBA (separate fields) color mode Each cell can contain color information in four separate fields. **All four fields must be present** with the exact names `red`, `green`, `blue`, and `alpha`, of any numeric type: - **Floating-point values** — 0–1 range - **Unsigned integer values** — Maximum possible range (e.g. 0–255 for a `UINT8` field) - **Signed integer values** — `-max` to `max` (e.g. −127 to 127 for an `INT8` field; a value of −128 is treated as identical to −127) :::tip The field names must match exactly (though the order doesn't matter). When these fields are detected, additional "Color Mode" options will become available. ::: #### `nav_msgs/OccupancyGrid` settings | field | description | | --- | --- | | **Color mode** | One of:
Costmap: pre-defined RViz color palette. Cannot customize settings further.
Custom: custom color palette using settings below | | **Min color** | Color corresponding to minimum cell value (0) | | **Max color** | Color corresponding to maximum cell value (100). Note that cells with value exactly 100 are displayed as fully transparent. | | **Unknown color** | Color corresponding to unknown cell value (−1) | | **Fallback color** | Color corresponding to cell values that fall outside the range from −1 to 100 | | **Frame lock** | "On" means the grid is locked to the frame specified by its `frame_id`, and will move as that frame's transforms change. "Off" means the grid is relative to the fixed frame and will not move after it is first displayed. | #### Incremental occupancy grid updates The 3D panel supports `map_msgs/OccupancyGridUpdate` messages for incremental costmap updates. ROS's `costmap_2d` node publishes two topics per costmap: - A **full grid** (`nav_msgs/OccupancyGrid`) at a low rate (typically 1–2 Hz) - **Partial updates** (`map_msgs/OccupancyGridUpdate`) at a higher rate (typically 3–12 Hz) The panel automatically pairs update topics to their base grid using the `_updates` suffix convention (e.g. `/costmap` and `/costmap_updates`). Update topics do not appear as separate entries in the settings sidebar — they are consumed internally. :::note Performance Each update triggers a full texture rebuild of the entire grid. The cost scales linearly at approximately **13 ns per cell**. Grids up to ~1.28 million cells (~1130×1130) fit within a single frame at 60 fps. Larger grids (e.g. 2000×2000 global costmaps) may cause frame drops during updates. ::: ### Image Images displayed in the 3D scene, using the corresponding [Camera field-of-view](#camera-field-of-view) messages. | framework | schema | | --- | --- | | ROS 1 | [`sensor_msgs/Image`](https://docs.ros.org/en/noetic/api/sensor_msgs/html/msg/Image.html) | | ROS 2 | [`sensor_msgs/msg/Image`](https://github.com/ros2/common_interfaces/blob/master/sensor_msgs/msg/Image.msg) | | ROS 1 | [`sensor_msgs/CompressedImage`](https://docs.ros.org/en/api/sensor_msgs/html/msg/CompressedImage.html) | | ROS 2 | [`sensor_msgs/msg/CompressedImage`](https://github.com/ros2/common_interfaces/blob/master/sensor_msgs/msg/CompressedImage.msg) | | Custom | [`foxglove.RawImage`](/docs/sdk/schemas/raw-image) | | Custom | [`foxglove.CompressedImage`](/docs/sdk/schemas/compressed-image) | #### Render modes Image topics in the 3D panel support three render modes. Each mode has context-specific settings. - [**Default**](#default) – Projects the image onto a distorted plane at a fixed distance from the camera. - [**Plane projection**](#plane-projection) – Projects the image onto the XY plane of a selected coordinate frame. - [**Depth map**](#depth-map) – Renders depth images as point clouds. #### Default The default render mode displays images using standard camera projection. This mode shows the following settings: | field | description | | --- | --- | | Render mode | Select how the image is rendered: **Default**, **Plane projection**, or **Depth map**. | | Distance | Distance from the camera at which the image is projected | | Planar projection factor | Controls the planar projection effect, from zero to one. Zero results in a curved plane with all points equidistant to camera origin. One results in a flat plane orthogonal to the camera's z (depth) axis. | #### Depth map The 3D panel can render uncompressed depth images as point clouds, enabling visualization of depth camera data directly in 3D space. To render a depth image as a point cloud, you need: - An uncompressed depth image topic with a supported encoding (`32FC1`, `16UC1`, `MONO16`, `8UC1`, `MONO8`, or `8UC3`), or a compressed depth image topic using `compressedDepth` 16-bit grayscale PNG - A corresponding [Camera field-of-view](#camera-field-of-view) message with camera calibration data Enable the depth image topic in the panel's topic settings, then set the **Render mode** to **Depth map**. Compressed depth images must be 16-bit grayscale PNG payloads (for example, ROS `compressedDepth` transport using `sensor_msgs/CompressedImage` with a `compressedDepth` format string). Depth values are interpreted as millimeters (see **Distance type** below for how values are projected into 3D). Other compressed formats (JPEG, color PNG, or 8-bit PNG) are not supported and will show an error. | field | description | | --- | --- | | Render mode | Select how the image is rendered: **Default**, **Plane projection**, or **Depth map**. Only one mode can be active at a time. Settings shown below are only visible when "Render mode" is set to "Depth map". | | Distance type | How to interpret pixel values: **Z-axis** (default) interprets each pixel as the distance along the camera's optical axis, while **Euclidean** interprets each pixel as the straight-line distance from the sensor origin. Use **Euclidean** for sensors that report range (e.g., time-of-flight cameras). | | Point size | Size of each rendered point in pixels | | Depth scale | Scale factor to convert depth values to meters. Defaults to 1.0 for 32-bit float images (`32FC1`) and 0.001 for all other encodings (`16UC1`, `MONO16`, `8UC1`, `MONO8`, `8UC3`). Customize this to match your camera system's depth scale configuration. | | RGB topic | Sibling RGB image topic to colorize the depth point cloud. When set, each point in the cloud is colored using the corresponding pixel from the RGB image. The RGB image can have a different resolution than the depth image, and Foxglove uses bilinear interpolation to sample colors accurately. Select "None" to use distance-based coloring instead. | | Color mode | Only shown when **RGB topic** is set to "None". One of:
Color map: color points by depth using a pre-defined color palette
Gradient: color points by depth using a smooth transition between two custom colors
Flat: render every point with the same custom color | | Flat color | Only shown if **Color mode** is set to **Flat**. Sets the point color and alpha. | | Color map | Only shown if **Color mode** is set to **Color map**. Maps depth values to "Turbo" (Google) or "Rainbow" (RViz). | | Gradient | Only shown if **Color mode** is set to **Gradient**. Sets the start and end colors for depth-based coloring. | | Opacity | Only shown if **Color mode** is set to **Color map**. Sets alpha for all points. | | Value min | Only shown if **Color mode** is **Color map** or **Gradient**. Minimum depth value used to normalize point colors. | | Value max | Only shown if **Color mode** is **Color map** or **Gradient**. Maximum depth value used to normalize point colors. | For accurate depth-to-RGB colorization, the depth and RGB images should use the same camera frame, or have matching intrinsics with only a rigid transform between frames. The current implementation does not perform stereo rectification, so you may see subtle colorization errors when the sensors are offset and have different intrinsics. #### Plane projection The 3D panel can project camera images onto a reference plane in the 3D scene. This is especially useful for ground-plane projection, where the elements on the ground-plane in the image can be lined up with objects in the 3D scene. However, things that are protruding or not on the plane will appear distorted. To use plane projection, enable the camera image topic in the panel's topic settings, then set the **Render mode** to **Plane projection** and select a **Projection frame** from the available transform frames. | field | description | | --- | --- | | Render mode | Select how the image is rendered: **Default**, **Plane projection**, or **Depth map**. Only one mode can be active at a time. Settings shown below are only visible when "Render mode" is set to "Plane projection". | | Projection frame | The coordinate frame to project into. The image will be projected onto this frame's XY plane. There must be a valid transform between this frame and the camera's frame. | ### Laser scan A single scan from a planar laser range-finder. Laser scans share the same color and display settings as [point clouds](#point-cloud), including color mode, color map, and gradient. | framework | schema | | --- | --- | | ROS 1 | [`sensor_msgs/LaserScan`](https://docs.ros.org/en/noetic/api/sensor_msgs/html/msg/LaserScan.html) | | ROS 2 | [`sensor_msgs/msg/LaserScan`](https://github.com/ros2/common_interfaces/blob/master/sensor_msgs/msg/LaserScan.msg) | | Custom | [`foxglove.LaserScan`](/docs/sdk/schemas/laser-scan) | ### Location fix A latitude, longitude, and altitude (LLA) coordinate, used to globally position [the scene](#frame), [3D Maps](#3d-map-custom-layer), and [map layers](#map-custom-layer) within it. Your location fix messages must use a `frame_id` in your transform tree. | framework | schema | | --- | --- | | ROS 1 | [`sensor_msgs/NavSatFix`](https://docs.ros.org/en/noetic/api/sensor_msgs/html/msg/NavSatFix.html) | | ROS 2 | [`sensor_msgs/msg/NavSatFix`](https://github.com/ros2/common_interfaces/blob/master/sensor_msgs/msg/NavSatFix.msg) | | Custom | [`foxglove.LocationFix`](/docs/sdk/schemas/location-fix) | ### ROS polygons Timestamped polygons made up of a series of connected points. | framework | schema | | --- | --- | | ROS 1 | [`geometry_msgs/PolygonStamped`](https://docs.ros.org/en/noetic/api/geometry_msgs/html/msg/PolygonStamped.html) | | ROS 2 | [`geometry_msgs/msg/PolygonStamped`](https://github.com/ros2/common_interfaces/blob/master/geometry_msgs/msg/PolygonStamped.msg) | ### ROS markers Similar to [scene entities](#scene-entity), these `Marker` messages describe primitive shapes or meshes. | framework | schema | | --- | --- | | ROS 1 | [`visualization_msgs/Marker`](https://docs.ros.org/en/noetic/api/visualization_msgs/html/msg/Marker.html) | | ROS 2 | [`visualization_msgs/msg/Marker`](https://github.com/ros2/common_interfaces/blob/master/visualization_msgs/msg/Marker.msg) | | ROS 1 | [`visualization_msgs/MarkerArray`](https://docs.ros.org/en/noetic/api/visualization_msgs/html/msg/MarkerArray.html) | | ROS 2 | [`visualization_msgs/msg/MarkerArray`](https://github.com/ros2/common_interfaces/blob/master/visualization_msgs/msg/MarkerArray.msg) | #### Mesh markers Markers with a `mesh_resource` field support the following URL schemes: - `http(s)://` - `package://` (Desktop app only) - `file://` (Desktop app only) And file formats: - glTF - STL - COLLADA - Wavefront OBJ **glTF (`.glb`)** This is the preferred format, as it enjoys the best performance of all supported file types. Binary glTF files bundle all required assets into a single file, with support for embedded meshes, compression, and the same physically-based material system used in Foxglove. As a result, your model should appear in Foxglove similarly to how it appears in other 3D programs. **STL (`.stl`)** STL files are well supported in Foxglove, but lack some of glTF's visualization features. The main advantage to STL is the ability to share the same files between your hardware manufacturing process and robot visualization tooling. STL was designed for 3D printing and CAD applications, and does not include materials or hierarchies of meshes. While they can be represented in a binary encoding, STL files are commonly represented with ASCII characters, which leads to larger files. **COLLADA (`.dae`)** As a predecessor to glTF, COLLADA has a similar feature set. With that said, it does have larger XML-based files, no compression, and additional processing overhead. There is a [bug in RViz](https://github.com/ros-visualization/rviz/issues/1045) where the up-axis metadata is ignored, resulting in incorrect orientations for many `.dae` files in ROS environments. To work around this, the 3D panel has a `Ignore COLLADA
Flat: solid color
Color map: pre-defined color palette
Gradient: smooth transition between two custom colors
BGR (packed): `sensor_msgs/PointCloud2` only; use embedded color from each point's `rgb` field (see below)
BGRA (packed): `sensor_msgs/PointCloud2` only; use embedded color from each point's `rgba` field (see below)
RGBA (separate fields): `foxglove.PointCloud` and `foxglove.CompressedPointCloud` only; use embedded color from each point's `red`, `green`, `blue`, and `alpha` fields (see below) | | Flat color | Only shown if "Color mode" is set to "Flat"; hex code for color of each point | | Color field | Only shown if "Color mode" is not set to "Flat"; value used for "Color map" coloring logic; any numeric field in message such as `x`, `y`, `z`, `
• **By type** (based on occupancy classification)
• **Gradient** (numeric field mapped to a gradient)
• **Rainbow** (predefined colormap) | | **Gradient** | Only shown if "Color mode" is set to "Gradient". User-defined color mapping for voxel values. | | **Marked and present** | Only shown if "Color mode" is set to "By type". RGBA color for voxels that are both marked and present. | | **Present** | Only shown if "Color mode" is set to "By type". RGBA color for voxels that are present but not marked. | | **Marked** | Only shown if "Color mode" is set to "By type". RGBA color for voxels that are marked but not present. | | **Use lighting** | Enables lighting for voxel shading in 3D view. | #### ROS Voxel classification When using **By type** coloring: - **Marked** voxels represent obstacles or areas flagged as non-traversable. - **Present** voxels represent observed but unmarked areas. - **Marked and present** voxels are both observed and flagged. Each voxel is rendered as a cube in 3D space and can be shaded based on lighting settings. The resolution and origin of the grid are defined in the message metadata (`resolutions`, `origin`, and `data` fields). #### `foxglove.VoxelGrid` settings | field | description | | --- | --- | | Color mode | One of:
Flat: solid color
Color map: pre-defined color palette
Gradient: smooth transition between two custom colors
RGBA (separate fields): use embedded color from each cell's `red`, `green`, `blue`, and `alpha` fields (see below) | | Color field | Only shown if "Color mode" is not set to "Flat"; numeric field in message used for coloring logic | | Color map | Only shown if "Color mode" is set to "Color map"; "Turbo" (Google) or "Rainbow" (RViz); for mapping "Color field" values to colors | | Gradient | Only shown if "Color mode" is set to "Gradient"; The two colors to interpolate between, based on the "color field" | | Opacity | Only shown if "Color mode" is set to "Color map" or "BGR (packed)"; sets alpha value for all cells | | Value min | Only shown if "Color mode" is not set to "Flat"; minimum value used to normalize incoming grid's "Color field" values | | Value max | Only shown if "Color mode" is not set to "Flat"; maximum value used to normalize incoming grid's "Color field" values | | Lighting | Only shown if "Elevation" is set; enables shading from simulated directional lighting, based on elevation surface normals | | Frame lock | "On" means the grid is locked to the frame specified by its `frame_id`, and will move as that frame's transforms change. "Off" means the grid is relative to the fixed frame and will not move after it is first displayed | | Draw behind | "On" means the grid is rendered before the rest of the scene, so it appears behind other scene elements regardless of their relative depth. "Off" means the grid is rendered normally | ##### RGBA (separate fields) color mode Each cell can contain color information in four separate fields, named `red`, `green`, `blue`, and `alpha`, of any numeric type: - **Floating-point values** — 0–1 range - **Unsigned integer values** — Maximum possible range (e.g. 0–255 for a `UINT8` field) - **Signed integer values** — `-max` to `max` (e.g. −127 to 127 for an `INT8` field; a value of −128 is treated as identical to −127) ## Settings ### Frame Select your 3D scene's references frames and target following mode. | field | description | | --- | --- | | **Fixed frame** | The stationary world reference relative to which all other objects in the scene are located. Elements that accumulate over time (for example, point clouds) are stored and displayed in this frame, and in 2D mode the camera faces this frame's x-y plane. By default the `
How the camera moves relative to the display frame during playback:
- **Pose** follows the display frame's position, roll, pitch, and yaw
- **Heading** follows the display frame's position and yaw (heading), while pitch and roll are removed so the horizon stays level (the fixed frame's Z-axis stays pointing up)
- **Position** follows the display frame's position only, with orientation aligned to the fixed frame
- **Off** does not update viewport
- **URL** – URL to the source URDF file in one of the following schemes:
- `http(s)://` – Over an HTTP(S) connection
- `package://` – Package path. Only supported when using the desktop app or a live connection that supports asset fetching, such as [`foxglove_bridge`](/docs/fleet/bridge).
- **File path** – Absolute file path to the source URDF file. Only supported when using the desktop app.
- **Parameteter** – Parameter containing the source URDF file.
- **Topic** – Topic containing the source URDF file.
- **Transforms** – URDF is controlled using transform data
- **Joint states** – URDF is controlled by a joint states topic
- **Auto** – Defaults to visual geometries, but falls back to collision geometries if there are no visuals
- **Visual** – Visual geometries
- **Collision** – Collision geometries
- **Street** (© OpenStreetMap contributors)
- **Satellite** (© [Esri](https://www.esri.com/) — Esri, i-cubed, USDA, USGS, AEX, GeoEye, Getmapping, Aerogrid, IGN, IGP, UPR-EGP, and the GIS User Community)
- **Shaded relief** – GEBCO grayscale bathymetry basemap (© GEBCO / NCEI)
- **Sea marks** – OpenSeaMap sea mark chart overlay (© OpenSeaMap contributors). Stack over a base map layer such as Street, Satellite, or Shaded relief.
- **Isobaths** – OpenSeaMap transparent depth contour overlay (© OpenSeaMap contributors). Stack over a base map layer such as Street, Satellite, or Shaded relief.
- **Custom** – Load from a custom URL (Academic, Pro, and Enterprise plans only). Provide a URL to your custom map tiles following the [Tile Map Service specs](https://wiki.osgeo.org/wiki/Tile_Map_Service_Specification), e.g. `https://my.custom.url/{x}/{y}/{z}` or `https://t{subdomain}.custom.url/tiles/a{quadkey}.jpeg`.
**Y deviation**
**Theta deviation** | Only available for the **2D pose estimate** tool. Standard deviation values used to create the published covariance matrix. | ## Controls and shortcuts Click any object in the scene to display its relevant details in the selected object popup.  Click the icons next to the topic to open its settings in the sidebar or to display its messages in a new [Raw Messages panel](/docs/visualization/panels/raw-messages). Selecting an object will set a `$selected_id` variable to the clicked object's `id` value, if it has one. For [ROS markers](#ros-markers) and [scene entities](#scene-entity), you can also set another variable on click. The panel controls on the right can be used to do the following: - **Select** — toggle object select mode - **3D** — Toggle between 3D and 2D views of the scene - **Measure** — measure the distance between two points - **Publish** — publish a message based on a clicked location in the 3D view By default, measurement endpoints are placed at the free-space cursor position on the ground plane. Hold `Alt` (Windows and Linux) or `Option` (macOS) while placing an endpoint to snap it to measurable objects in the scene — like cube faces, point cloud points, and line segments — when the cursor is near one. This is useful for measuring distances between known features in the scene. :::note The click-to-publish feature requires a data source that supports publishing, such as the [Foxglove Bridge](/docs/fleet/bridge) or a [custom WebSocket server](/docs/getting-started/custom#live-data) with the `clientPublish` capability enabled. ::: Activate the currently-selected publish tool by clicking on the icon. Right-click or click and hold to switch between tools. 
| Keyboard and mouse shortcuts | |
| `w` | Move camera forward |
| `a` | Move camera to the left |
| `s` | Move camera backward |
| `d` | Move camera to the right |
| `Shift`+`w` | Rotate camera up |
| `Shift`+`a` | Rotate camera left |
| `Shift`+`s` | Rotate camera down |
| `Shift`+`d` | Rotate camera right |
| Scroll | Zoom in and out |
| Drag | Move camera parallel to the ground (x-y plane) |
|
Drag (when the camera is angled toward the horizon) `Alt` + drag (Windows and Linux) `Option` + drag (macOS) |
Move camera parallel to the screen (enable z-axis) |
| `Shift` + drag, or right-click-drag | Rotate the camera around the target position |
| `1` | Re-center the camera on the chosen display frame |
| `3` | Toggle between 2D bird's-eye view and 3D perspective view |
| `i` | Show or hide the object inspector |
|
Hold `Alt` (Windows and Linux) Hold `Option` (macOS) |
Temporarily enable measurement snapping while measuring |
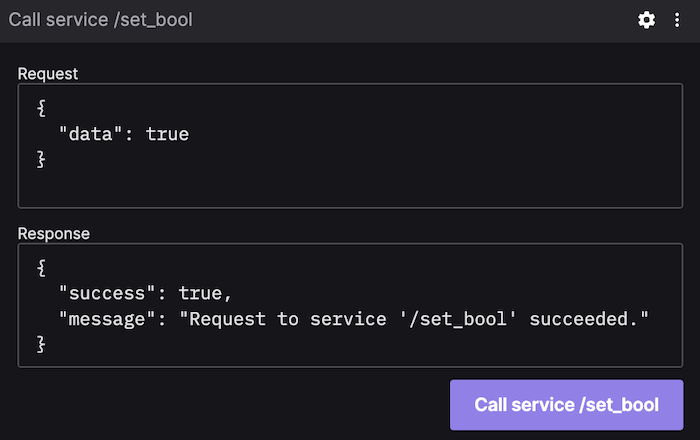 In [Comparison mode](/docs/visualization/comparison-mode#reading-the-comparison), use the **Data source** picker in the panel toolbar to choose which slot to display.
## Settings
### General
| field | description |
| --- | --- |
| **Service name** | Name of service to make a request to |
| **Layout** | Positioning of request and response inputs ("Vertical" or "Horizontal") |
| **Editing mode** | When enabled, editing the request is allowed and the response content is displayed. When disabled, only the button is visible. |
| **Timeout** | Maximum time to wait for a response |
### Button
Configure the button for calling the service.
| field | description |
| ----------- | ------------------- |
| **Title** | Button text |
| **Tooltip** | Button tooltip text |
| **Color** | Button color |
## Controls and shortcuts
The "Call service" button will be disabled until connected to a supported data source.
Format the service request using valid JSON in the "Request" input, and click the "Call service" button. The result will appear in the "Response" input.
---
## State Transitions panel
**URL**: /docs/visualization/panels/state-transitions
**Description**: Track when the discrete values selected by expressions change.
The State Transitions panel visualizes changes in discrete values from your expressions. Use [FoxQL](/docs/visualization/foxql) to specify which values to track. [FoxQL functions](/docs/visualization/foxql#functions) are supported; see the [Series](#series) settings for details.
The panel displays data for specified topics across the entire visualization time range.
Current playback time will be indicated by a vertical gray bar.

Paths can point to any primitive value (numbers, booleans, enums, etc.), but will be most useful for [enums](/docs/visualization/annotate-ros-enum-fields).
:::note
Constants included in your ROS message definition will be displayed as a label for each "enum" plot. Limit enums to one per message definition, as Foxglove will not know which constant name to use in the event of multiple matches.
:::
## Settings
### General
| field | description |
| --- | --- |
| **Sync with other plots** | Sync zooming and panning with other plots |
| **Show points** | Show a point for each incoming message |
| **Show series labels** | Display series labels. When hidden, rows compress to fit more series on screen |
### X-axis
| field | description |
| --- | --- |
| **Axis label** | Label displayed along the time axis |
| **Timestamp format** |
In [Comparison mode](/docs/visualization/comparison-mode#reading-the-comparison), use the **Data source** picker in the panel toolbar to choose which slot to display.
## Settings
### General
| field | description |
| --- | --- |
| **Service name** | Name of service to make a request to |
| **Layout** | Positioning of request and response inputs ("Vertical" or "Horizontal") |
| **Editing mode** | When enabled, editing the request is allowed and the response content is displayed. When disabled, only the button is visible. |
| **Timeout** | Maximum time to wait for a response |
### Button
Configure the button for calling the service.
| field | description |
| ----------- | ------------------- |
| **Title** | Button text |
| **Tooltip** | Button tooltip text |
| **Color** | Button color |
## Controls and shortcuts
The "Call service" button will be disabled until connected to a supported data source.
Format the service request using valid JSON in the "Request" input, and click the "Call service" button. The result will appear in the "Response" input.
---
## State Transitions panel
**URL**: /docs/visualization/panels/state-transitions
**Description**: Track when the discrete values selected by expressions change.
The State Transitions panel visualizes changes in discrete values from your expressions. Use [FoxQL](/docs/visualization/foxql) to specify which values to track. [FoxQL functions](/docs/visualization/foxql#functions) are supported; see the [Series](#series) settings for details.
The panel displays data for specified topics across the entire visualization time range.
Current playback time will be indicated by a vertical gray bar.

Paths can point to any primitive value (numbers, booleans, enums, etc.), but will be most useful for [enums](/docs/visualization/annotate-ros-enum-fields).
:::note
Constants included in your ROS message definition will be displayed as a label for each "enum" plot. Limit enums to one per message definition, as Foxglove will not know which constant name to use in the event of multiple matches.
:::
## Settings
### General
| field | description |
| --- | --- |
| **Sync with other plots** | Sync zooming and panning with other plots |
| **Show points** | Show a point for each incoming message |
| **Show series labels** | Display series labels. When hidden, rows compress to fit more series on screen |
### X-axis
| field | description |
| --- | --- |
| **Axis label** | Label displayed along the time axis |
| **Timestamp format** |